This is Step 2 of 5 to set up your MapBuilder map.

In this tutorial you will learn:
- What is an ArcGIS Online web application?
- How to create an ArcGIS Online application with the MapBuilder template
To start this tutorial, you need:
- An ArcGIS Online account: Read more about ArcGIS Online accounts here
- The web map that you created in the previous tutorial. If you did not create a web map, go back to Step 1: Create a web map in ArcGIS Online.
This tutorial is also available on video
About web applications on ArcGIS Online
ArcGIS Online includes a variety of web applications that allow you to interact with maps and data. Most ArcGIS Online web applications include a web map, which you learned about in the previous tutorial. You can think of a web application as an upgraded web map that provides more functionality to your users.
MapBuilder is a special kind of web application called an ArcGIS Configurable App. It is a template that you can use as a starting point for adding your own data. Read more about configurable apps here.
About the MapBuilder application template
The MapBuilder template turns your web map into an interactive monitoring application by preloading the most relevant and up-to-date WRI datasets and analyses on forests, climate, land and more. Leverage powerful geospatial analysis tools with our tree cover loss, land cover composition and near real-time deforestation alerts.
Create a web application in ArcGIS Online using the MapBuilder template
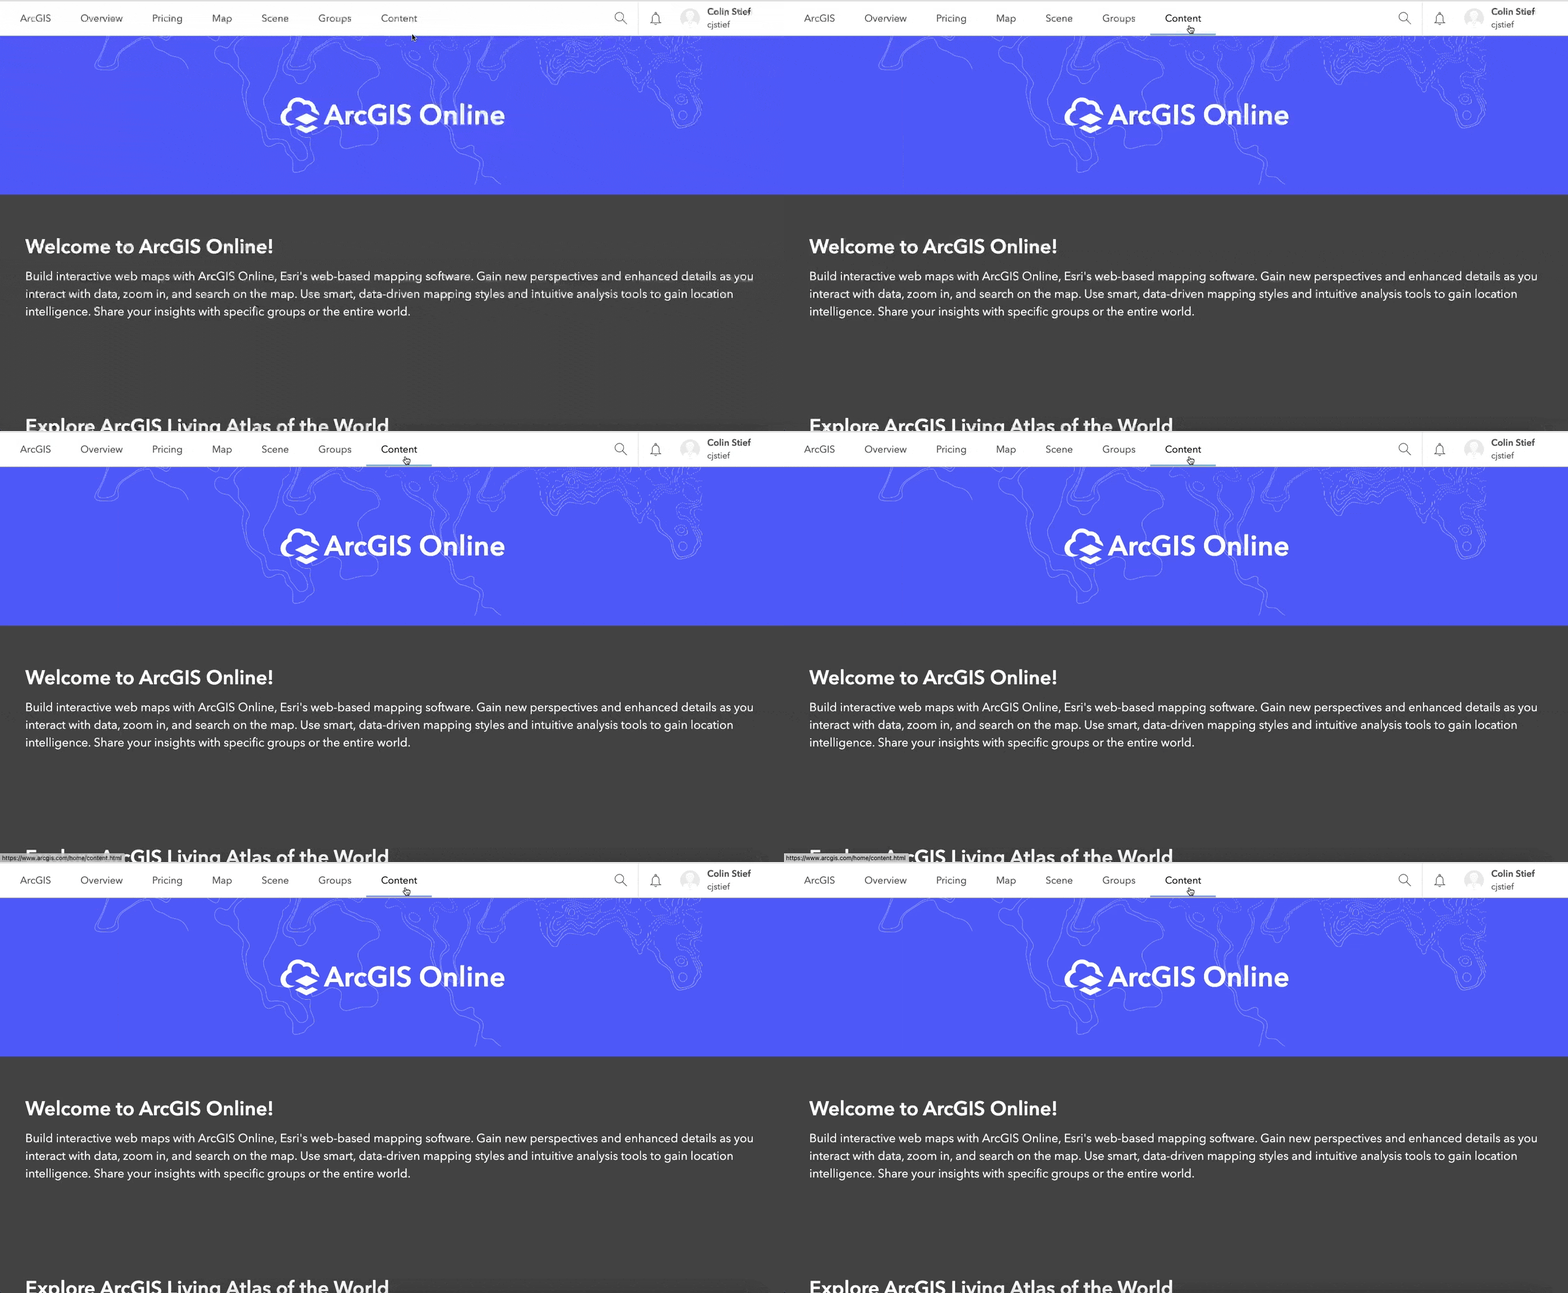
1. Navigate to the content section of ArcGIS Online
- Navigate to ArcGIS Online.
- Make sure to sign in so that you can save your application.
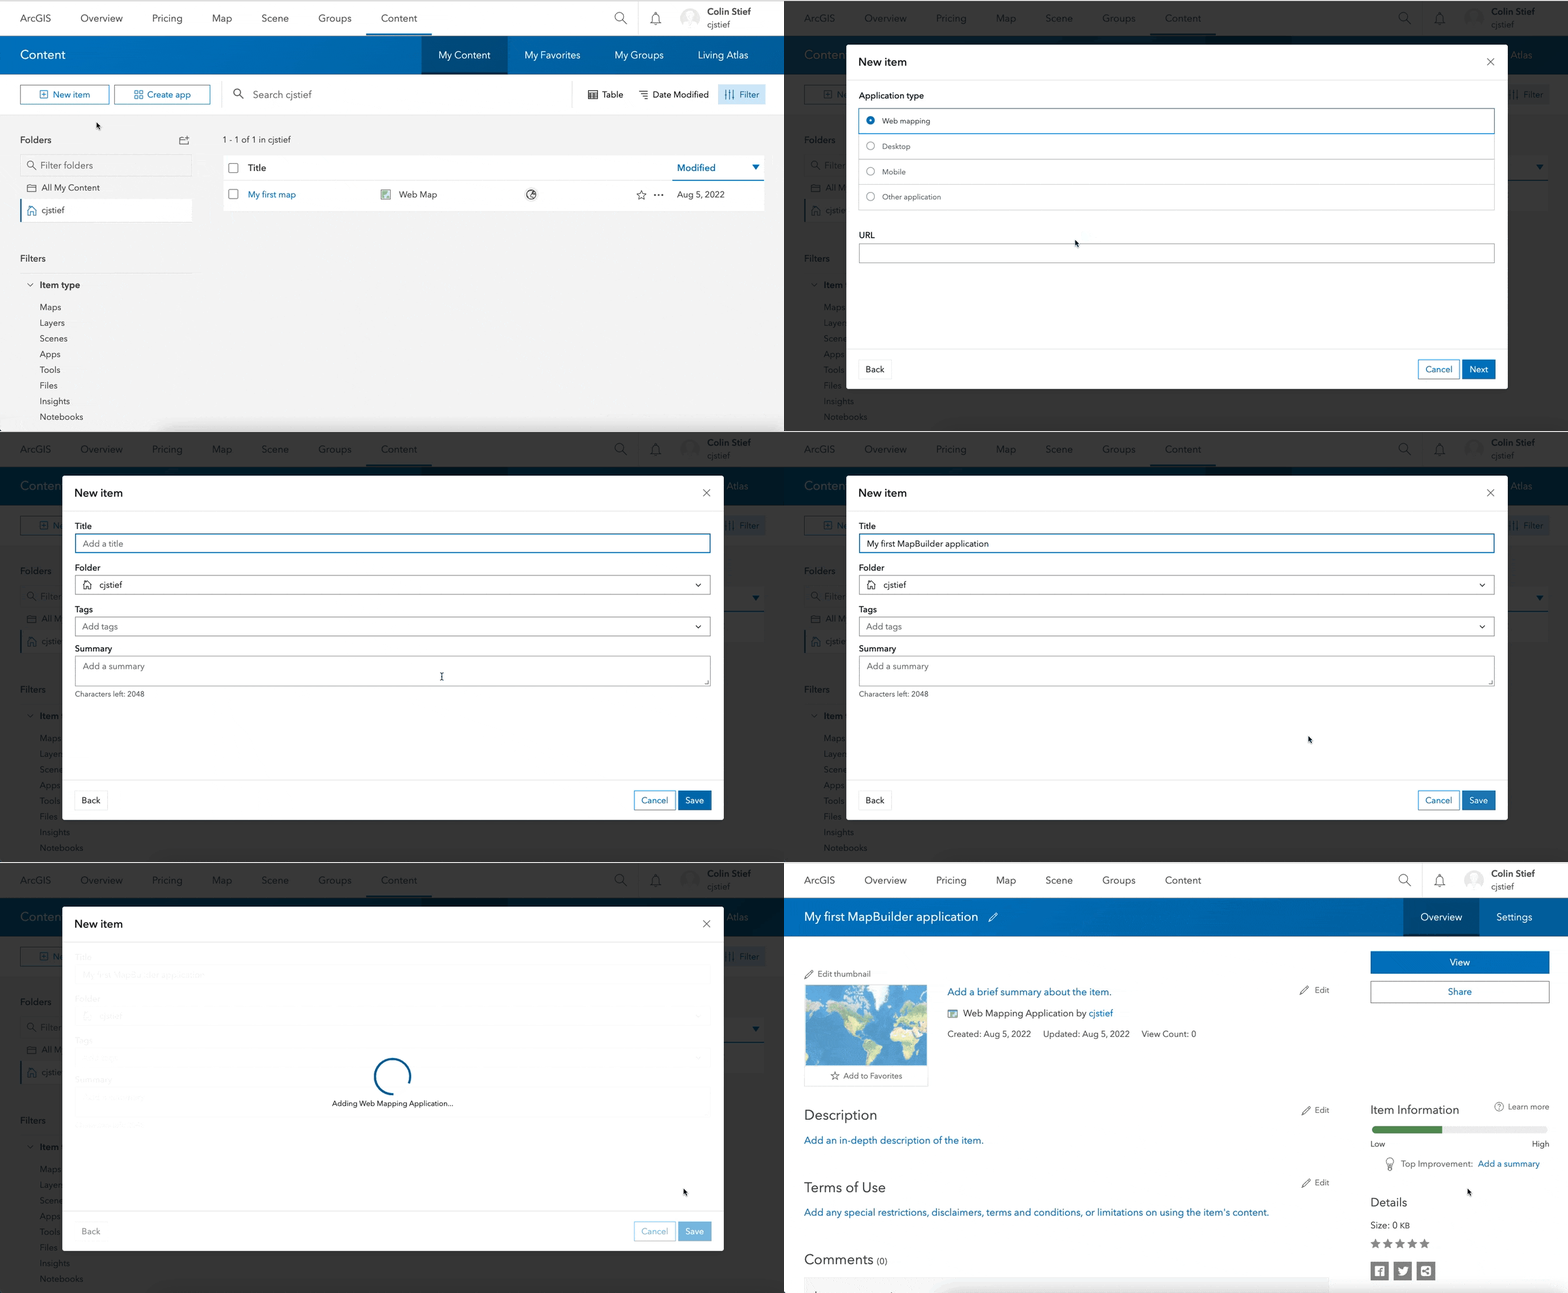
- Click Content on the top menu. You will be brought to a page that lists the various items of content saved on your ArcGIS Online account. You should see the map you created in the previous tutorial.
2. Add a new application item using the MapBuilder template URL
- Click the New item button
- Click the Application button
- Enter the following in the URL bar:
- Enter a title for your application
- Click the Save button
You will be brought to the item details page for your MapBuilder application.
3. (Optional) Make your web map publicly accessible
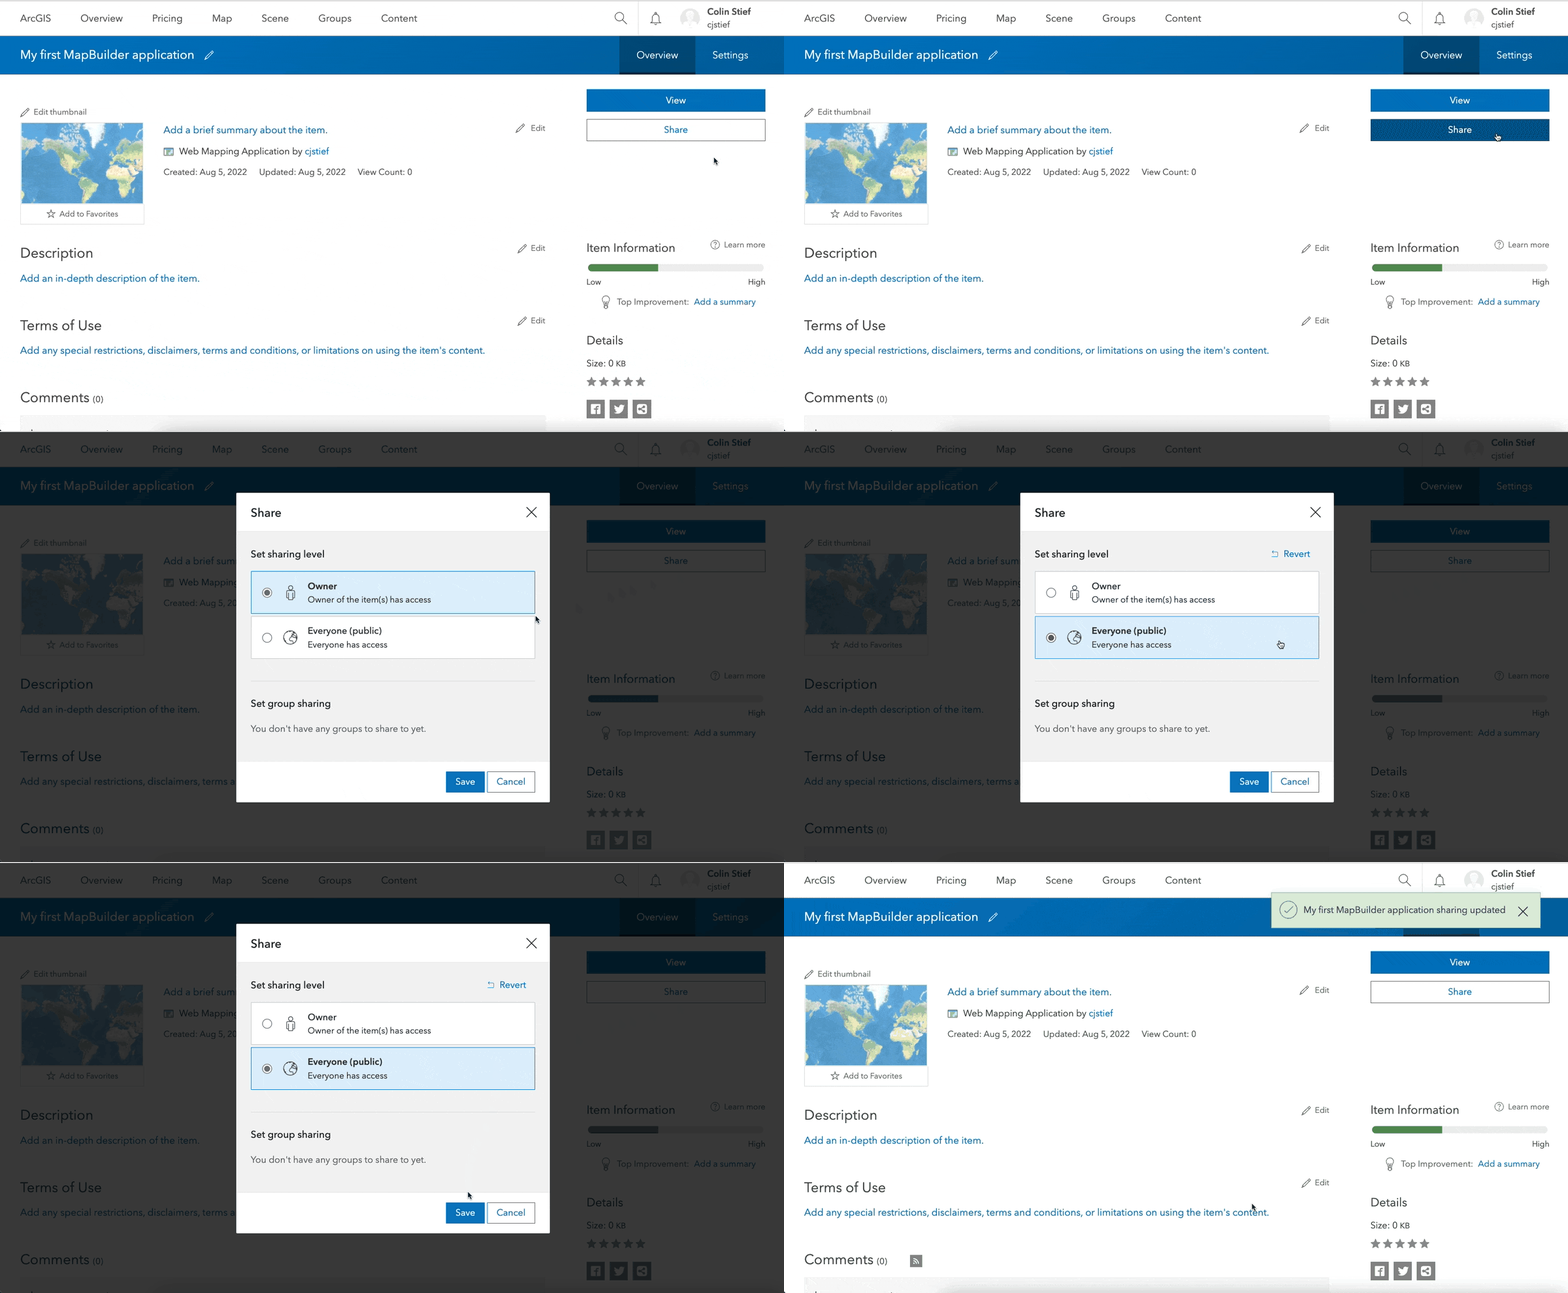
By default, your application is not publicly accessible. You will not be able to share it with others and you must be signed in to your ArcGIS Online account to view it. If you would like to change this to allow anyone to view the application:
- Click on the Share button
- Select Everyone (public) option
- Click the Save button.
4. Find your application ID in the settings
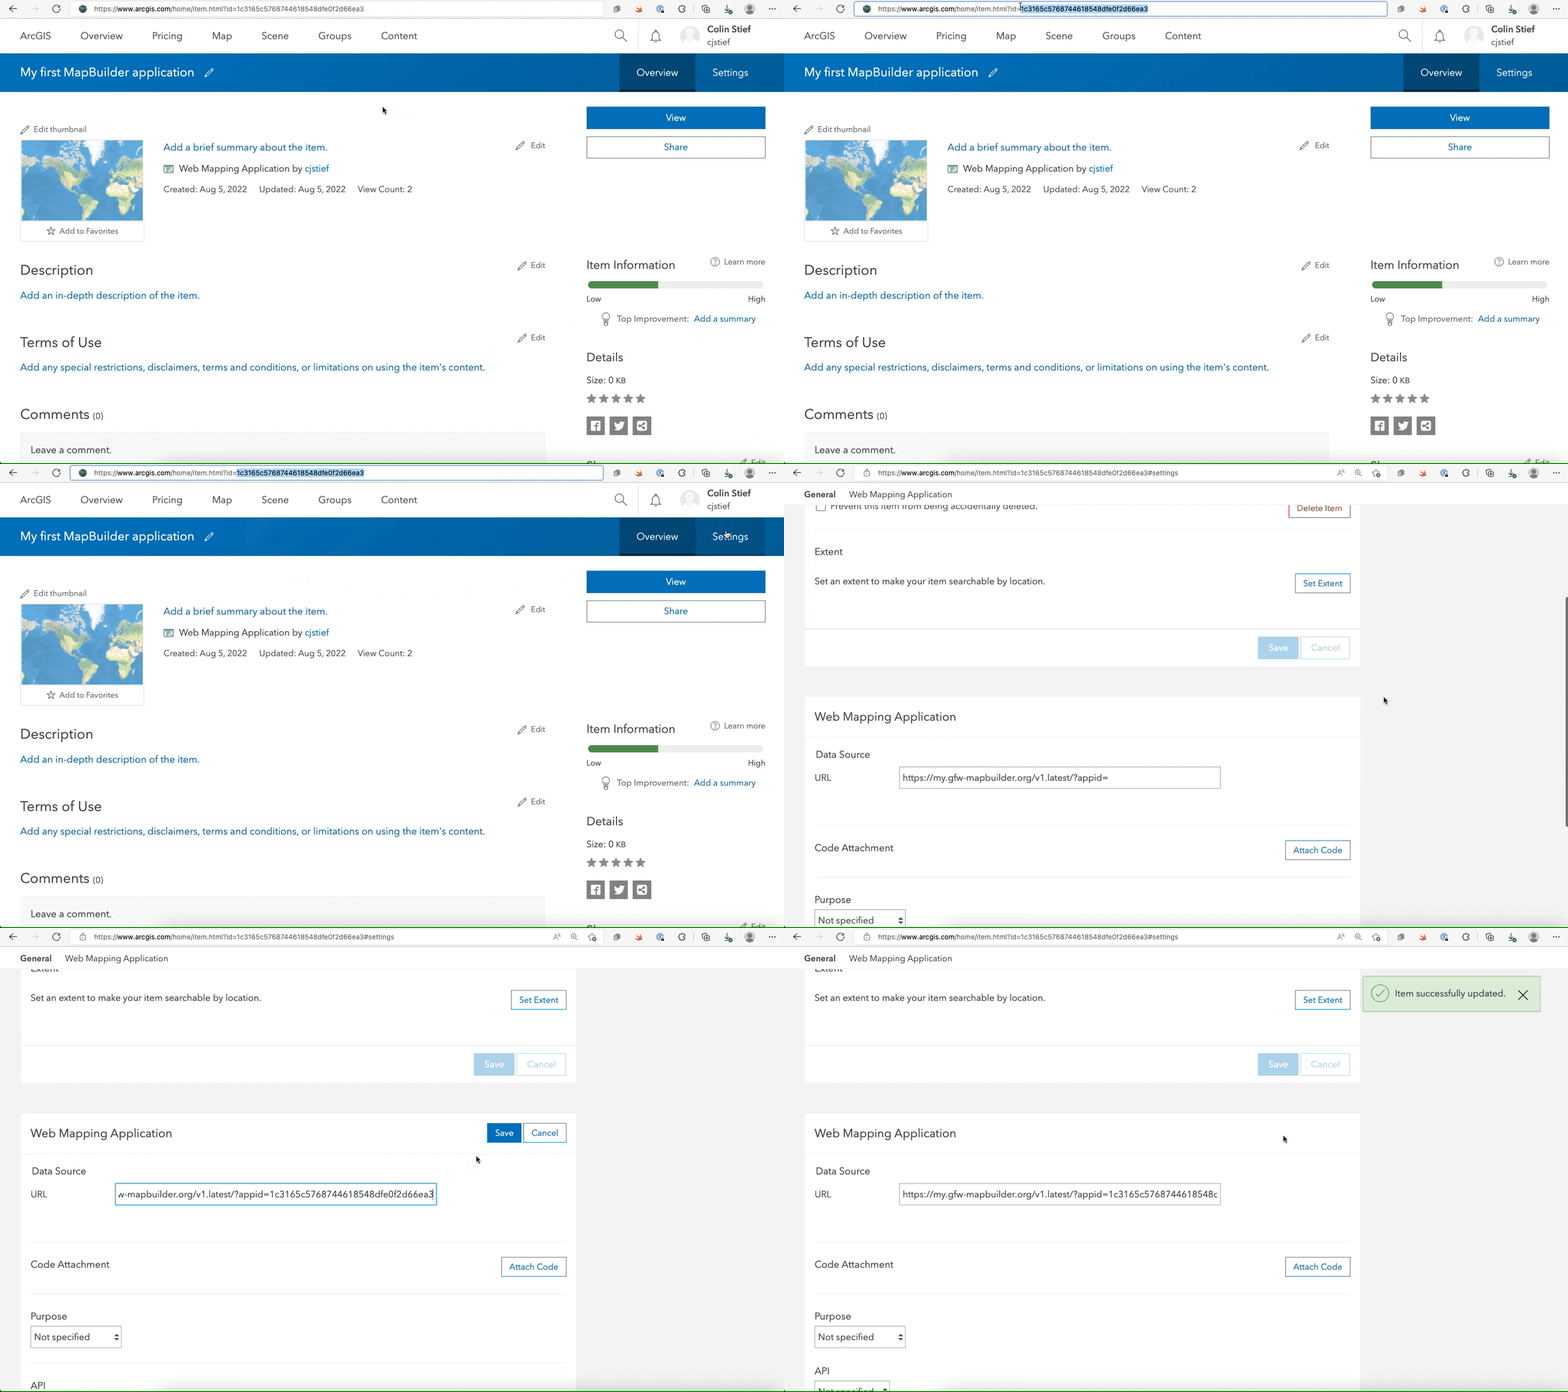
- Find the application ID in your browser's URL bar (see screenshot below)
- Copy the ID. You can do this by highlighting all of the characters after the "?id=" part of the URL, then right-clicking and selecting "copy" from the menu that appears.
- Paste the ID somewhere for the next step
5. Construct the full application URL
- Start with the following URL:
- Then add the application ID from the previous step to the end.
- For example, a complete application URL would look like:
-
- Paste the full application URL somewhere for the next step
5. Add the full application URL to app settings
- Click on the Settings button
- Scroll down until you see the section Web Mapping Application
- In the Data Source subsection, paste the full application URL into the URL bar
- Scroll down until you see the Purpose setting
- Select Configurable from the options
- Click the Save button
You have now completed Step 2 of 5 for creating your own MapBuilder application. Please do not close the web app tab as you will need it in the following steps. If you closed it by mistake during the process, click here to go to the content page and select your application from the list of items.


