This is Step 3 of 5 to set up your MapBuilder application.

In this tutorial you will learn:
- How to complete the configuration form
- How this configuration relates to your web map and MapBuilder application
- How to add your configuration parameters to the MapBuilder application
To start this tutorial, you need:
- An ArcGIS Online account: Read more about ArcGIS Online accounts here
- The web map that you created in a previous tutorial. If you did not create a web map, go back to Step 1: Create a web map in ArcGIS Online
- The web application that you created in the previous tutorial. If you did not create a web application, go back to Step 2: Create a MapBuilder application in ArcGIS Online
About the MapBuilder Configuration Form
The MapBuilder Configuration Form is an easy-to-use tool developed by WRI that enables users to efficiently customize their MapBuilder application in ArcGIS Online.
The Configuration Form creates a block of text called the Configuration File that specifies how you want to customize your MapBuilder application. You will enter the File in to your MapBuilder application settings in ArcGIS Online.
Once this form is completed, you will see a block of text called the Configuration File that you will enter in your ArcGIS Online application. This Configuration File will connect your web map with WRI’s cutting-edge data and mapping analysis tools. Choose the data you are interested in, link it to your website, and add a description.
Complete the Configuration Form
There are 4 tabs in the Configuration Form. This tutorial will introduce you to each one.
1. Launch the Configuration Form
2. If necessary, complete your user profile
- The first time you complete the Configuration form, you will need to complete a user profile. This will let us know how we can improve the application to meet your use case.
3. Complete the General Settings tab
3a. ArcGIS Online web map URL & ID
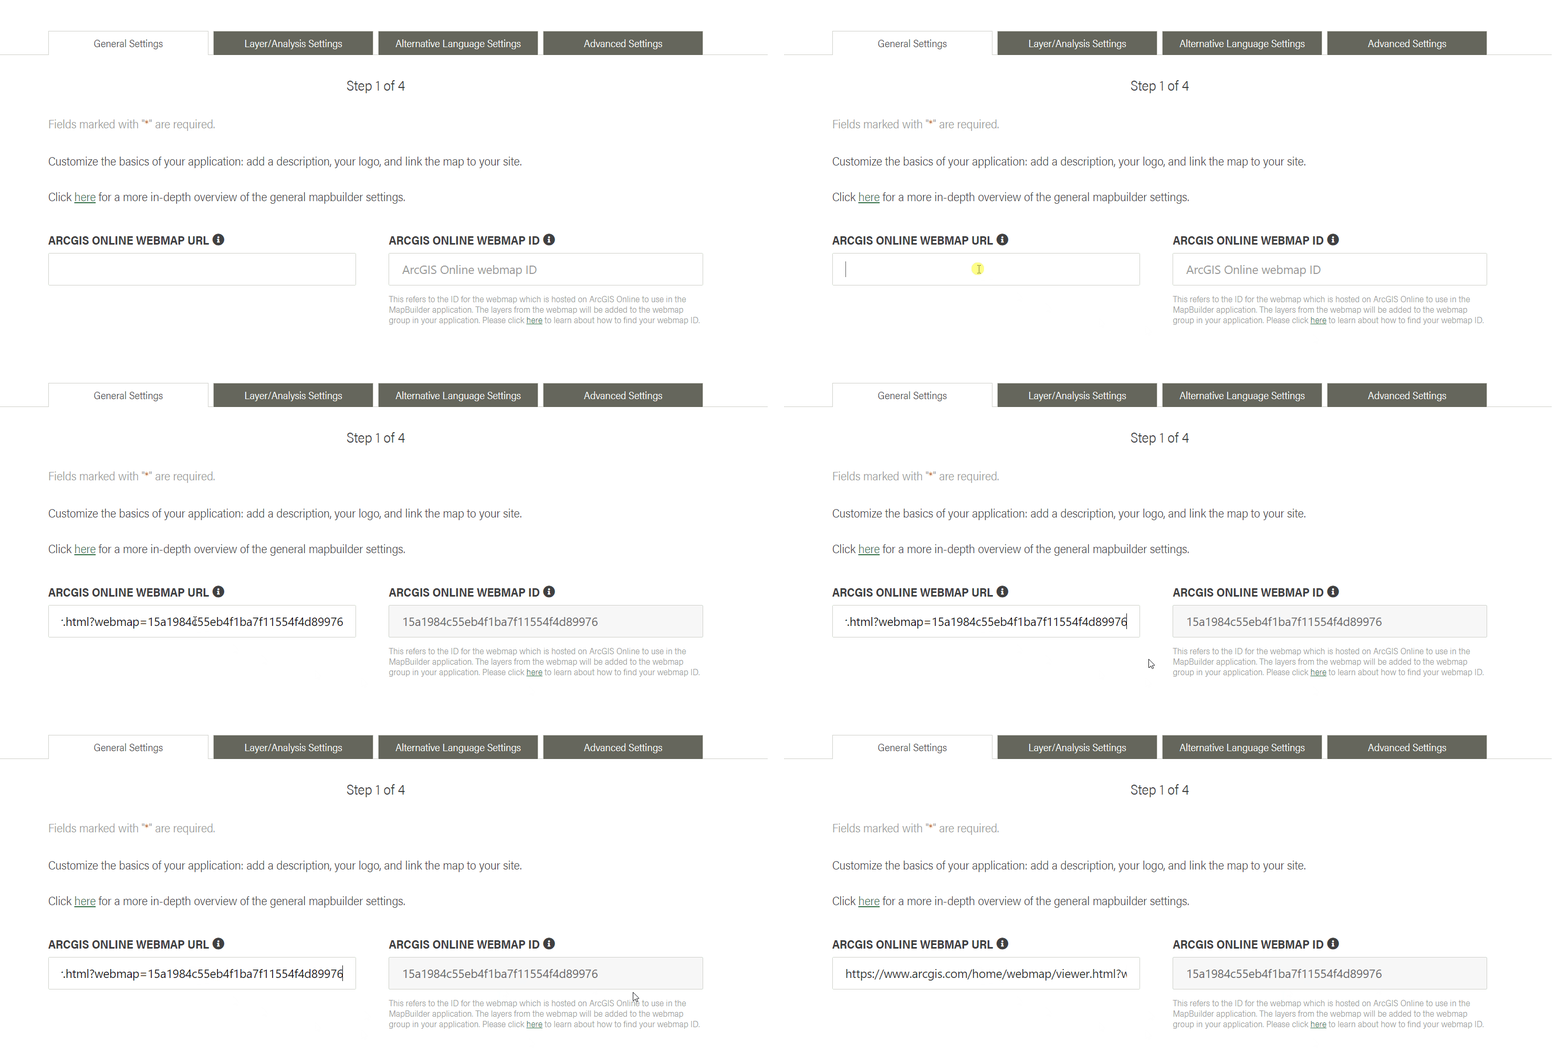
In the next steps, you will use the configuration form to automatically find your web map ID from the complete web map URL.
- Make sure you are signed in to ArcGIS Online and navigate to your web map in the Map Viewer. This is where you finished the previous tutorial, Step 1 - Create a web map in ArcGIS Online. If you closed that tab, you can open it again by doing the following:
- Navigate to the Content page in ArcGIS Online
- Click on the name of your web map. This will take you to the item details page.
- Click the Open in Map Viewer button in the top right of the page.
- Copy the entire web map URL from your browser's URL bar (see screenshot below). You can do this by highlighting all of the characters, then right-clicking and selecting "copy" from the menu that appears.

- Scroll down until you see the configuration box labeled ARCGIS ONLINE WEBMAP URL
- Enter your web map URL in this box
- The web map ID will automatically appear in the adjacent box labeled ARCGIS ONLINE WEBMAP ID
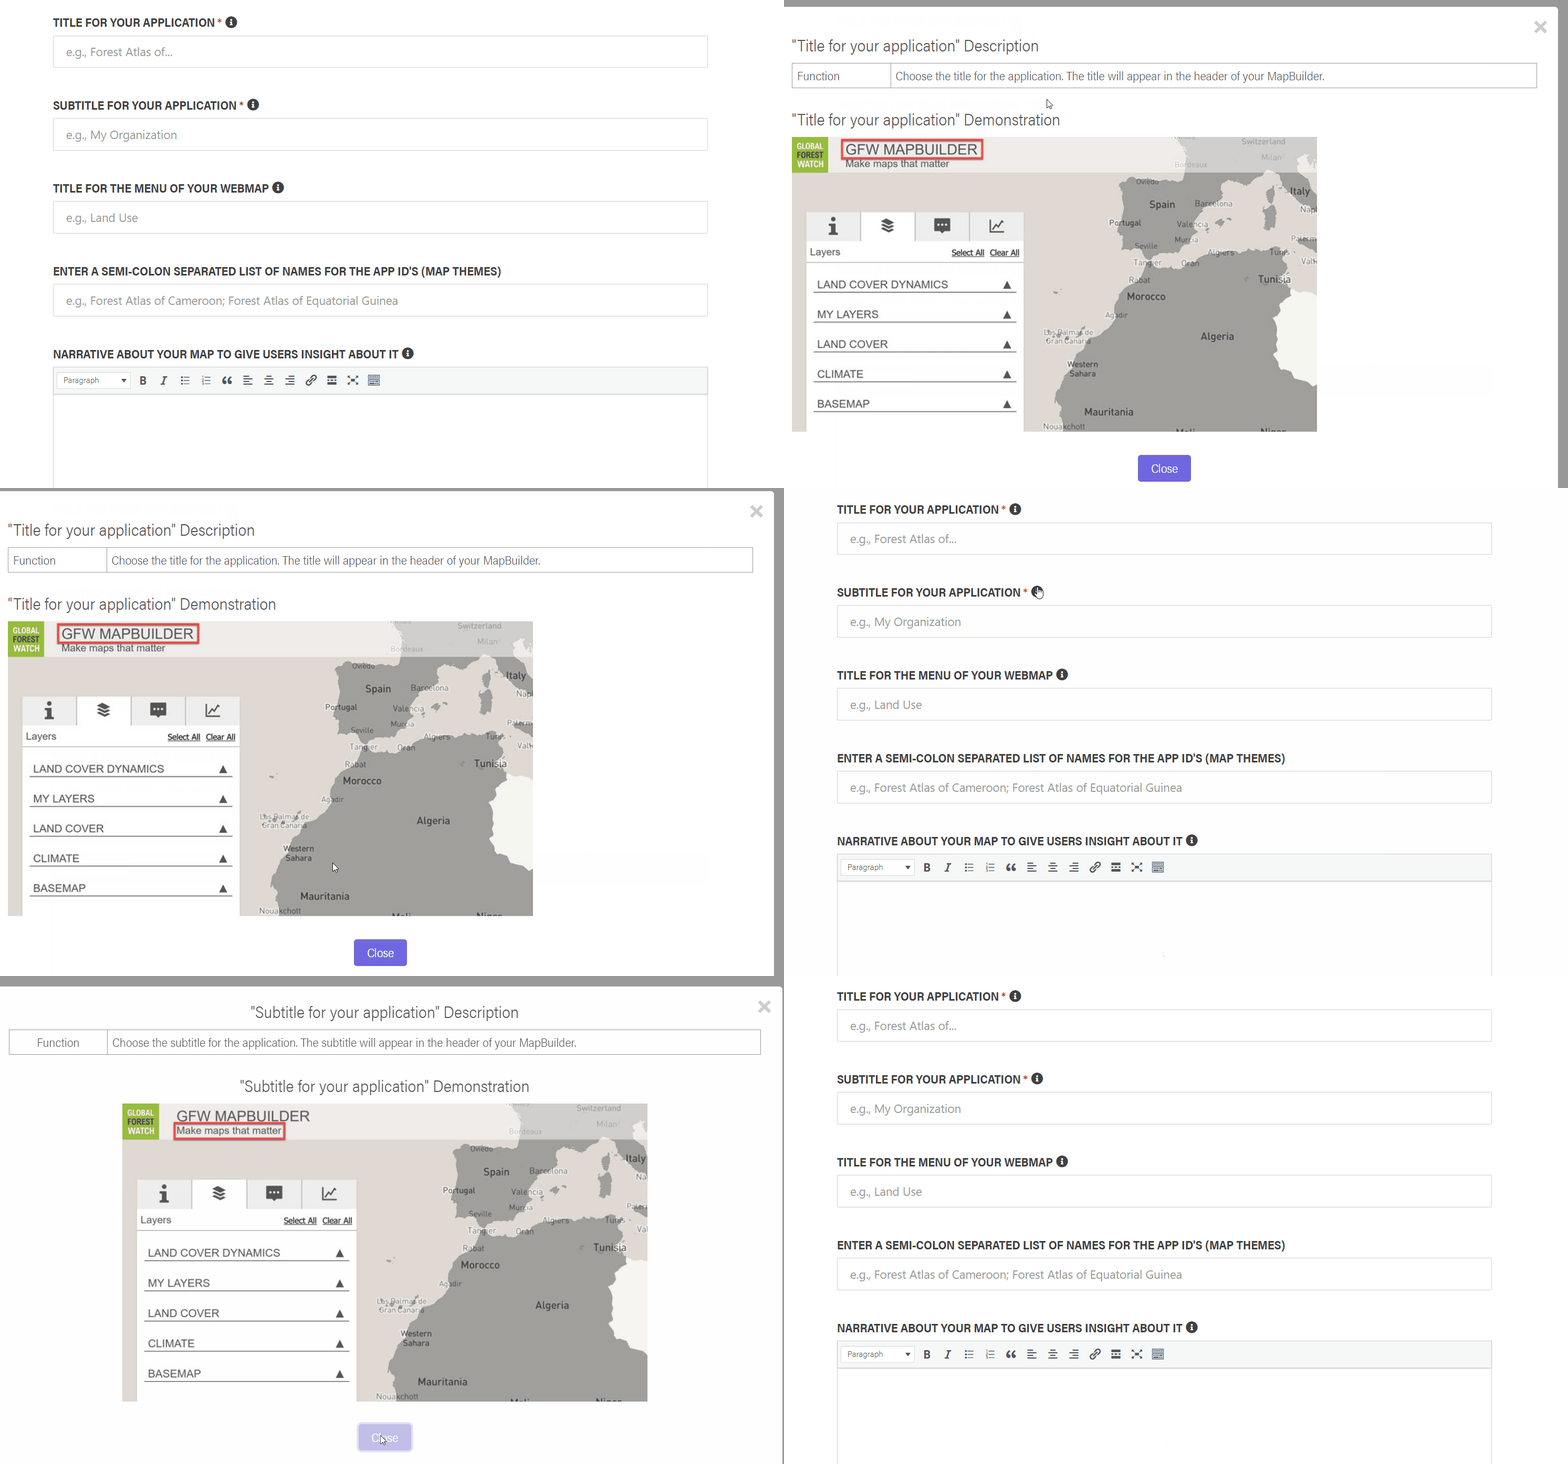
3b. Remaining fields in the General Settings tab
- Complete the required fields and any other optional fields.
- Click on the buttons with the i icon to find out more information about a particular configuration option.
4. Complete the Layer/Analysis tab
- Select the WRI data sets that you want to include in your MapBuilder map. To learn more about the details of each dataset, click here.
- For the ISO code insert the 3-digit country alpha code.
5. Complete the Alternative Language Settings tab
- This section is not mandatory, edit it only if you want to translate your MapBuilder map into another language. For more details about how to do this, click here.
6. Complete the Advanced Settings tab
- You can add your own Google Analytics ID code for tracking analytics purposes.
7. Examine and save your Configuration File
- Click Next to get your Configuration File
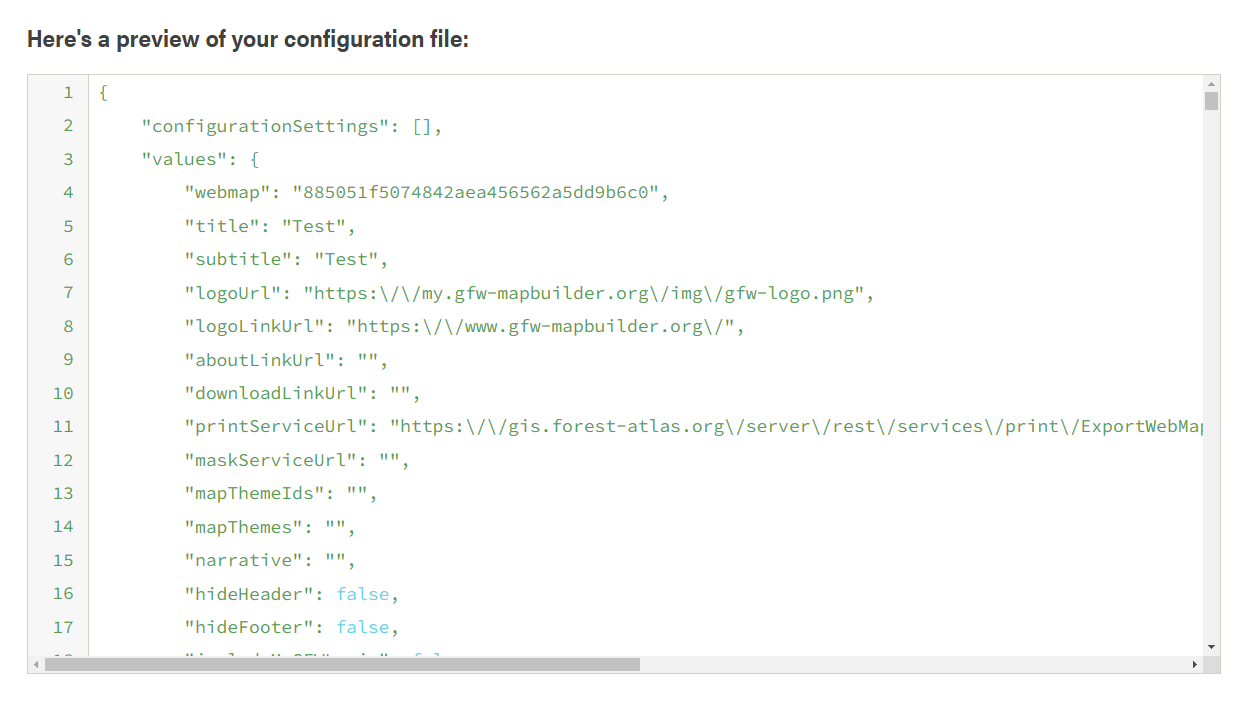
The Configuration File is a block of text that specifies how you want to customize your MapBuilder map. You can edit the details of this file in the future using a text editor.
We recommend that you download or save each file before editing as you will not be able to recover previous versions. The code should like this:
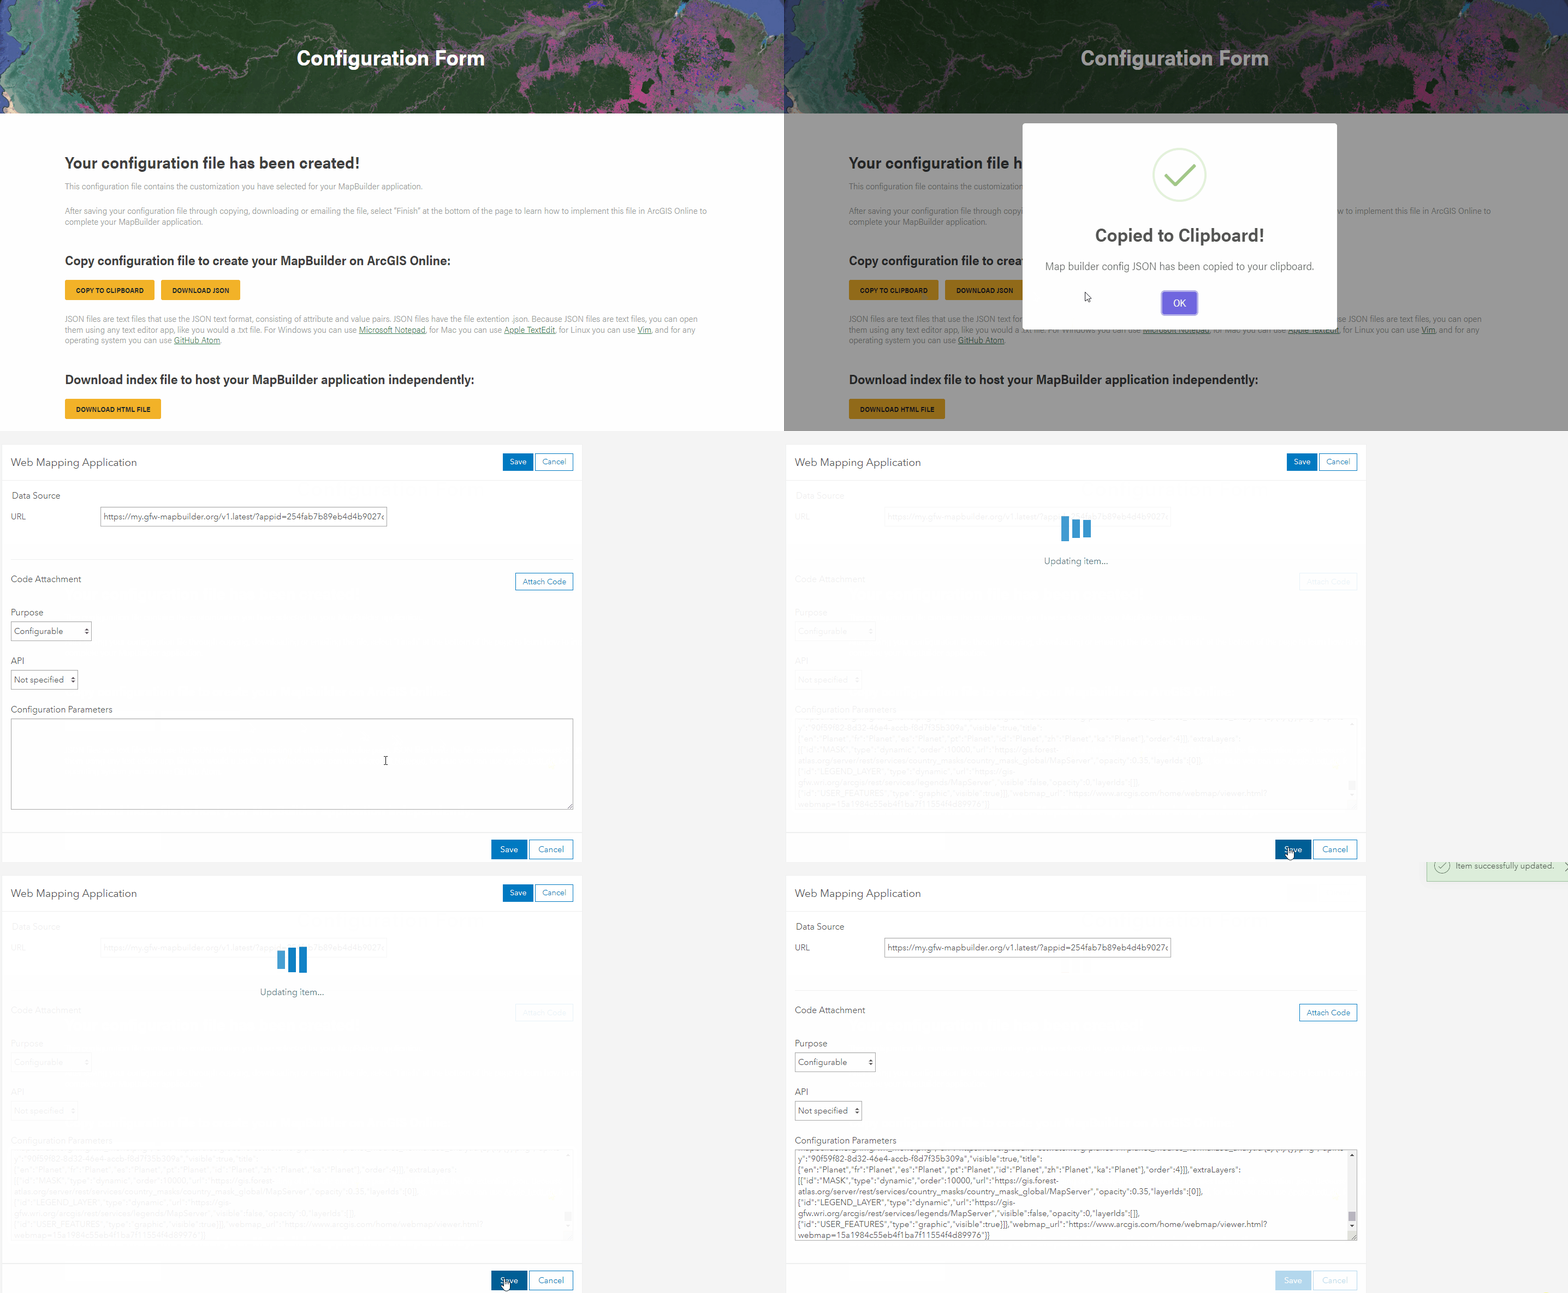
When you are ready to continue, do one of the following:
- Download the file
- Send the file to your email
- Or, copy the code directly
You will use this code in the next step. DO NOT CLOSE this tab, otherwise, you will have to start the form from the beginning.
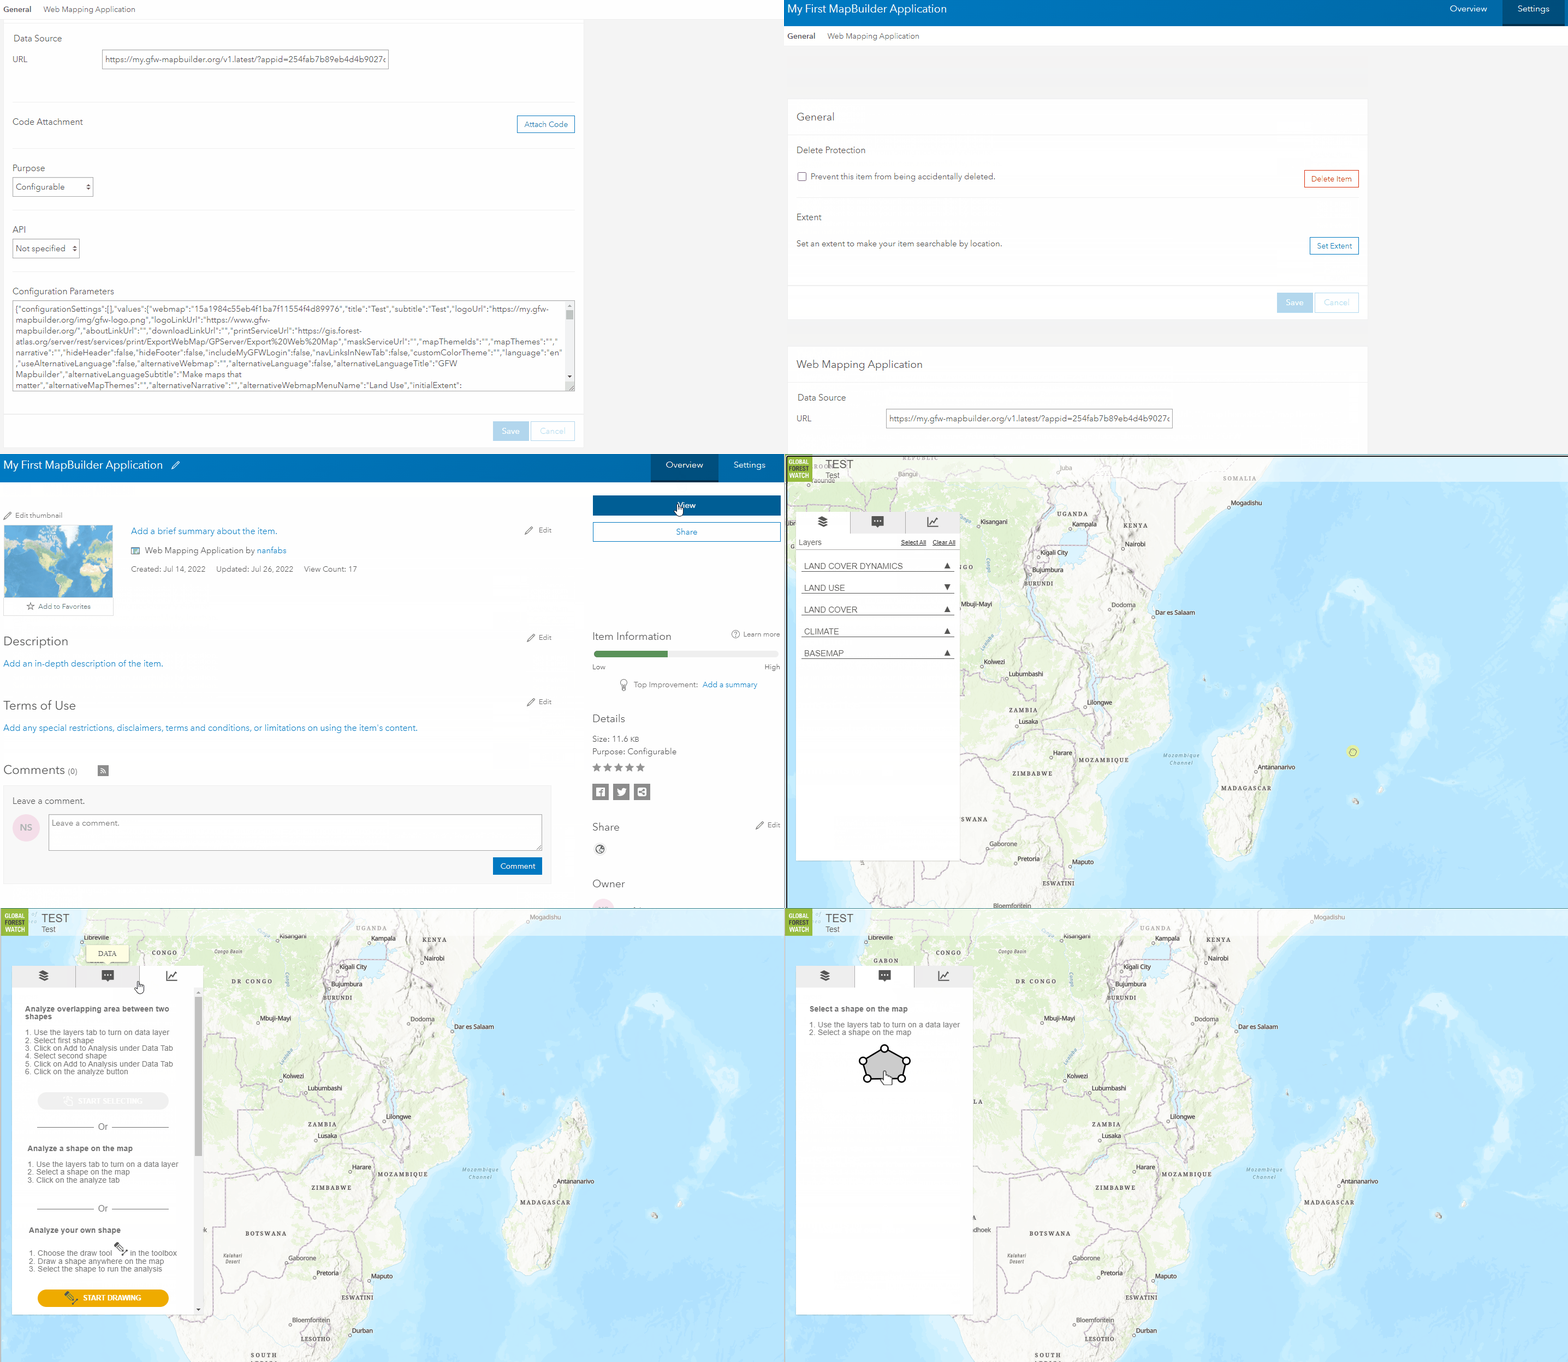
8. Enter the Configuration File into your application's Configuration Parameters box in ArcGIS Online
- Make sure you are signed in to ArcGIS Online and navigate to the Content page
- Click on the name of the web application you created in Step 2: Create a MapBuilder application in ArcGIS Online. This will take you to the item details page.
- Click the Settings button
- Scroll down to the Configuration Parameters box
- Paste your Configuration File into the Configuration Parameters box
- Click the Save button
The Configuration File should be entered in the Configuration Parameters box, which appears in the settings of your ArcGIS Online application.
9. View your MapBuilder application
You are almost done!
- Click on Overview to return to the item details page of your MapBuilder Application.
- Click the View Application button to open your MapBuilder application
If your application doesn’t look like the example, review the previous steps of this tutorial, read our Resources page or Contact Us for further guidance.
You have now completed Step 3 of 5 for creating your own MapBuilder application.


