This is Step 5 of 5 to set up your MapBuilder application.

In this tutorial you will learn:
- How to add a small shapefile to ArcGIS Online
- How to add a layer from the ArcGIS Living Atlas of the World
- How to add an ESRI ArcGIS web service URL
To start this tutorial, you need:
- An ArcGIS Online account: Read more about ArcGIS Online accounts here
- The web map that you created in Step 1: Create a web map in ArcGIS Online.
- The MapBuilder web application that you created in Step 2: Create a MapBuilder application in ArcGIS Online
Where to add data in MapBuilder
As you learned about in Step 4: Prepare your data, there are two locations that you can add data to your MapBuilder application:
- ArcGIS Online web map: The simplest way to add data to your MapBuilder application. This is the same web map that you created in Step 1: Create a web map in ArcGIS Online. Any data that you add to this web map will appear in a specific layer group in the application.
- Configuration File: For more advanced use cases, you can edit the Configuration File you created in Step 3: Complete the Configuration Form.
This tutorial will focus on three examples of adding data to your ArcGIS Online web map.
This tutorial focuses on the easiest approach to getting custom data into MapBuilder, which is to add it to your ArcGIS Online web map.
Adding custom data to MapBuilder using your ArcGIS Online web map
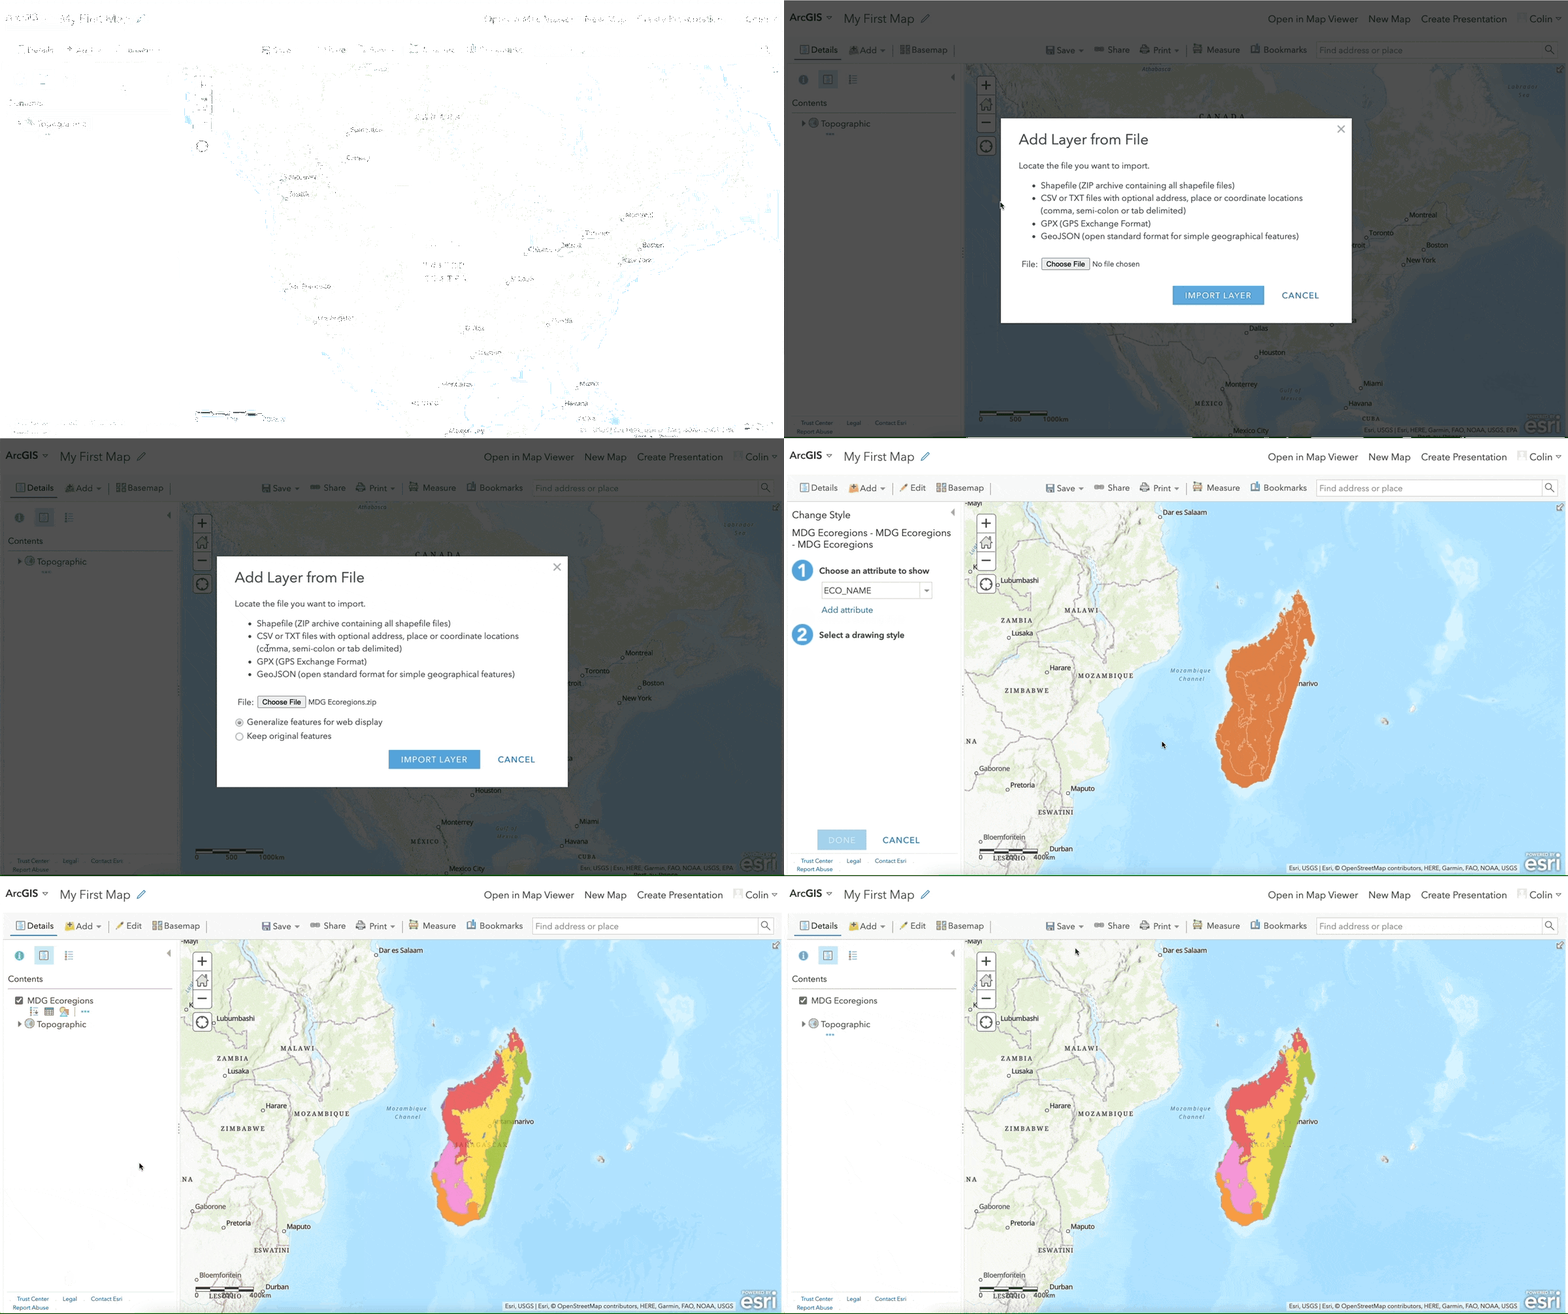
1. Add a small shapefile
With a free public account, users can upload and host a limited amount of vector data (up to 2GB) on ArcGIS Online.
1a. Download our sample data
Download the small shapefile linked below of the ecoregions in Madagascar. This data is in a .zip file format and comes from the 2017 Resolve Ecoregions. Remember where you save this shapefile because you will be adding to your web map shortly.
1b. Navigate to the Map Viewer Classic
Make sure you are signed in to ArcGIS Online and navigate to your web map in the Map Viewer Classic. This is where you finished the previous tutorial, Step 1 - Create a web map in ArcGIS Online. If you closed that tab, you can open it again by doing the following:
- Navigate to the Content page in ArcGIS Online
- Click on the name of your web map. This will take you to the item details page
- Click the Open in Map Viewer Classic button in the top right of the page
1c. Upload the shapefile via the Map Viewer
- Click the Add button in the top toolbar
- Click the Add Layer from File button from the menu
- Click the Choose File button
- Choose the shapefile you downloaded in the first step. You must select the original file, which is a .zip file format.
- Click the Import Layer button
- Optionally, adjust the layer settings in the left panel. For example, you can change the layer title or the styling. If you're interested in learning more about the adjusting options, go to our Resources page.
1d. Save your map
- Click the Save button in the top toolbar
- Click the Save button from the menu to save your web map
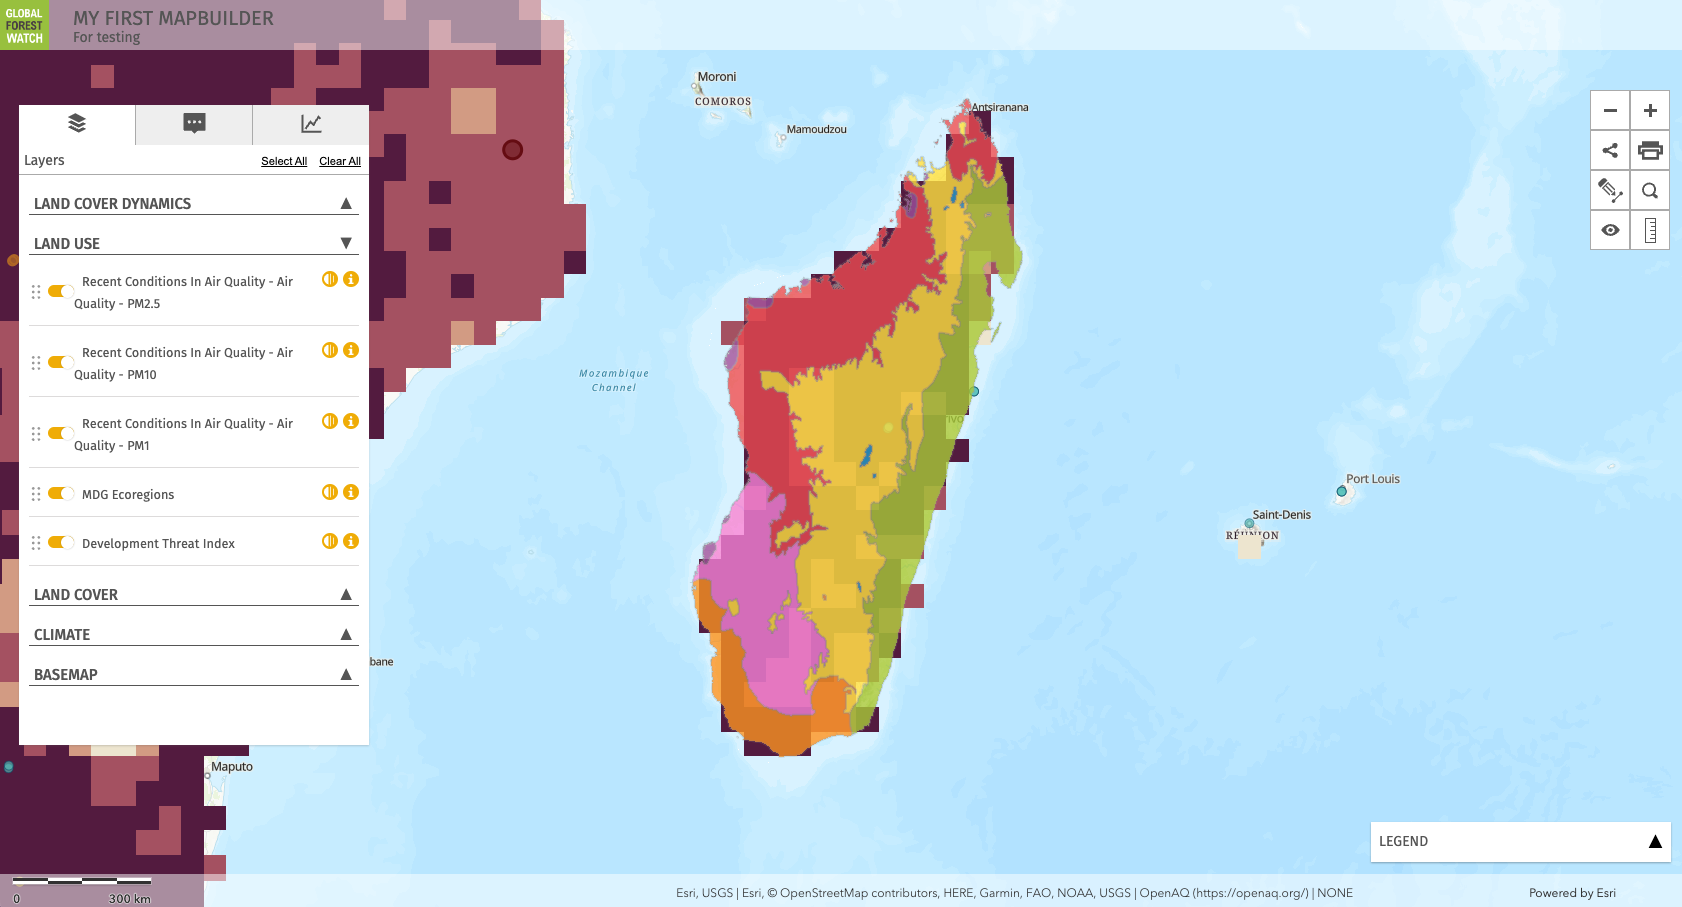
Once you save your web map with this new data, it will automatically appear in your MapBuilder application.
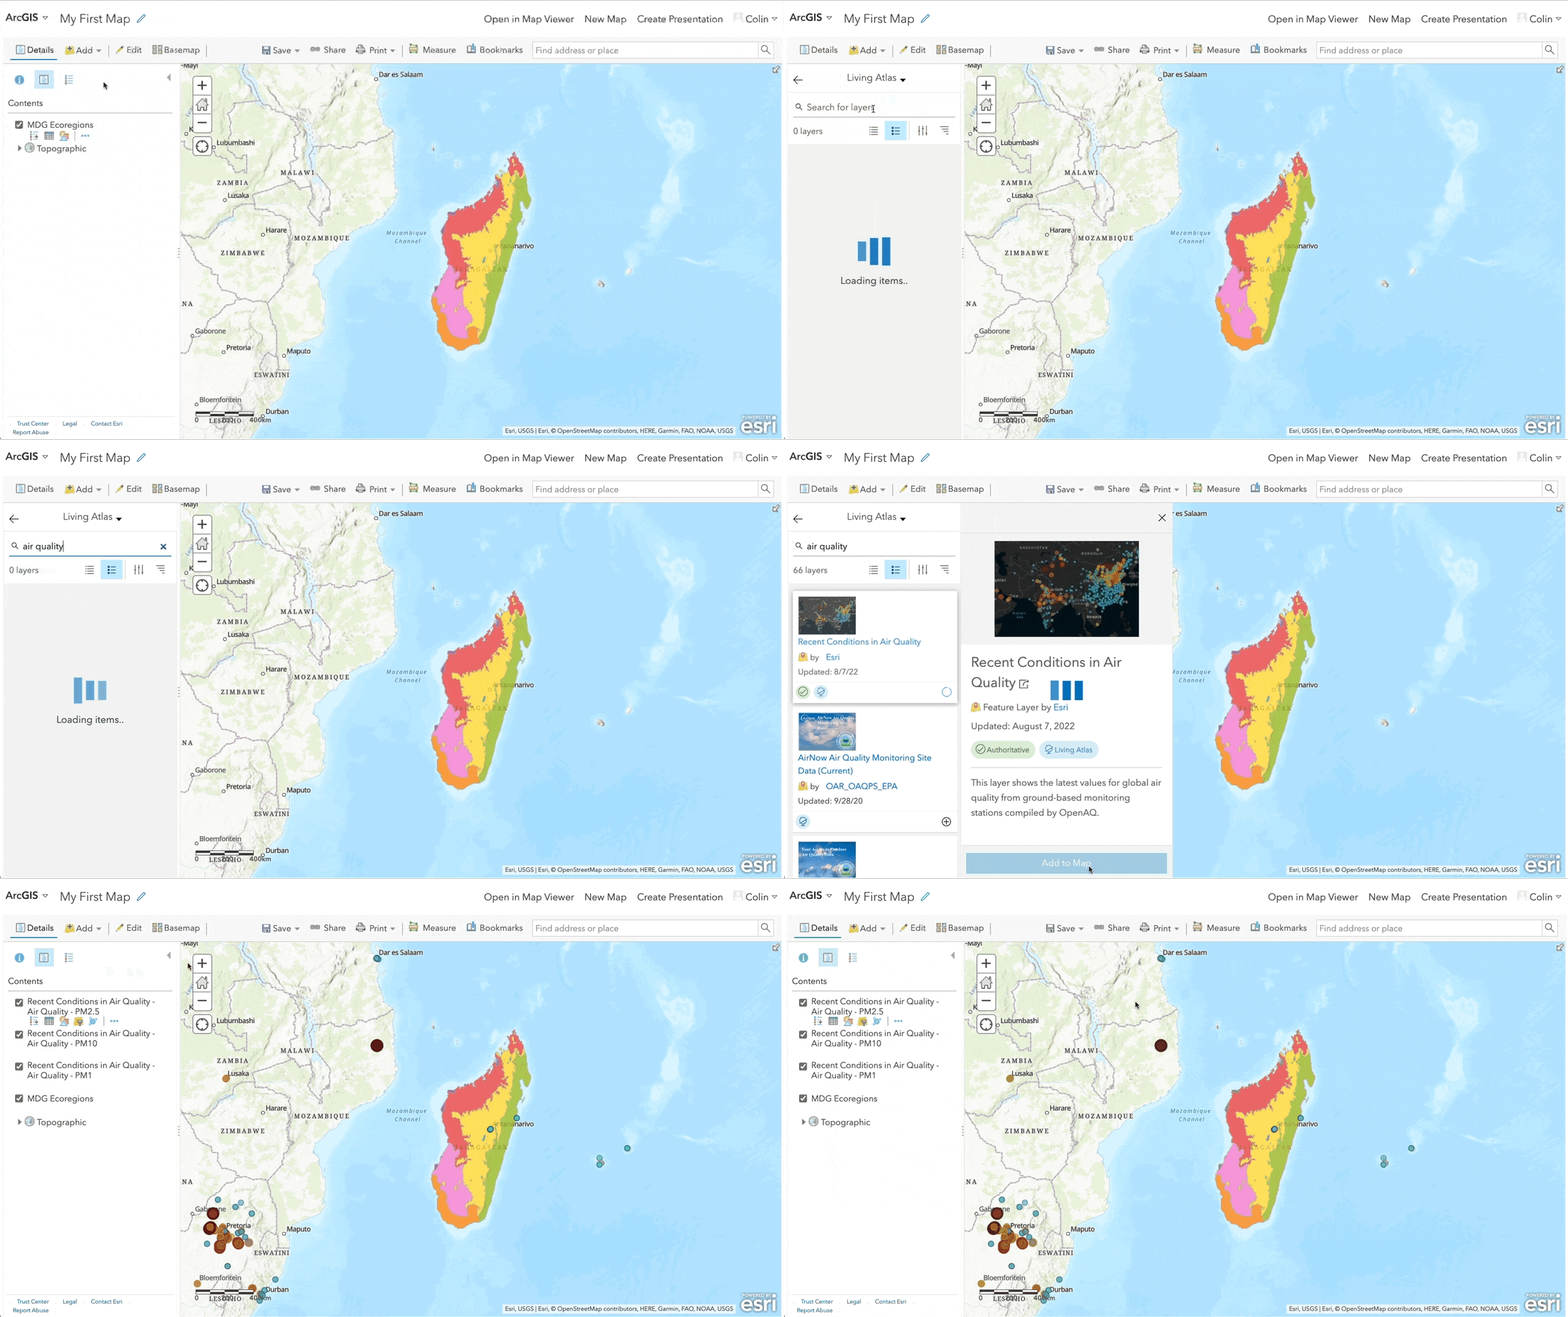
2. Add layers from the ArcGIS Living Atlas of the World
If you do not want to host your own data, a great option is to add layers from existing third-party sources like the ArcGIS Living Atlas of the World.
1a. Navigate to the Map Viewer
Make sure you are signed in to ArcGIS Online and navigate to your web map in the Map Viewer Classic.
1b. Search for a layer and add it to the map
- Click the Add button in the top toolbar
- Click the Browser Living Atlas Layers button from the menu
- Enter "air quality" in the search bar and press enter
- Click on Recent Conditions in Air Quality
- Click Add to Map
- Clik the back arrow icon in the top left of the left side panel to return to your list of Contents. Here, you can see that 3 layers from the Air Quality dataset were added to your map.
1c. Save your map
- Click the Save button in the top toolbar
- Click the Save button from the menu to save your web map
Congratulations! You have completed the final step for setting up a basic MapBuilder application!

Go to the Share your MapBuilder application tutorial to see different ways to share your new application.
To learn about more advanced customizations of MapBuilder, go to the tutorials page and explore the Additional Tutorials section.
If you experienced any problems with these tutorials or would like to provide any feedback, please contact us.


