In this tutorial you will learn:
- The different types of layers you can add using the configuration file
- How layers are organized in a layer group
- How to add a new layer object
- Additional properties for customizing a layer object
To start this tutorial, you need:
- A MapBuilder web application. If you do have one, visit the tutorial Step 2: Create a MapBuilder application in ArcGIS Online
- An understanding of how to edit your configuration file in ArcGIS Online
- An understanding of layer groups
Types of layers you can add to the configuration file
As you learned about in Step 4: Prepare your data, you can add the following types of datasets through the configuration file:”
- Tiled Layer: Cached raster or vector data hosted on ArcGIS Online or ArcGIS Server.
- Dynamic Map Service: A non-cached layer hosted on ArcGIS Server
- Image Service: Layers hosted on ESRI Image Server
- Web Tiles: Layer following the XYZ protocol with z/x/y format
- Web Map Service (WMS): Layer following the standard WMS protocol. Currently, this is supported but has some known bugs.
- Web Feature Service (WFS): Layer following the standard WFS protocol. Currently, this is supported but has some known bugs.
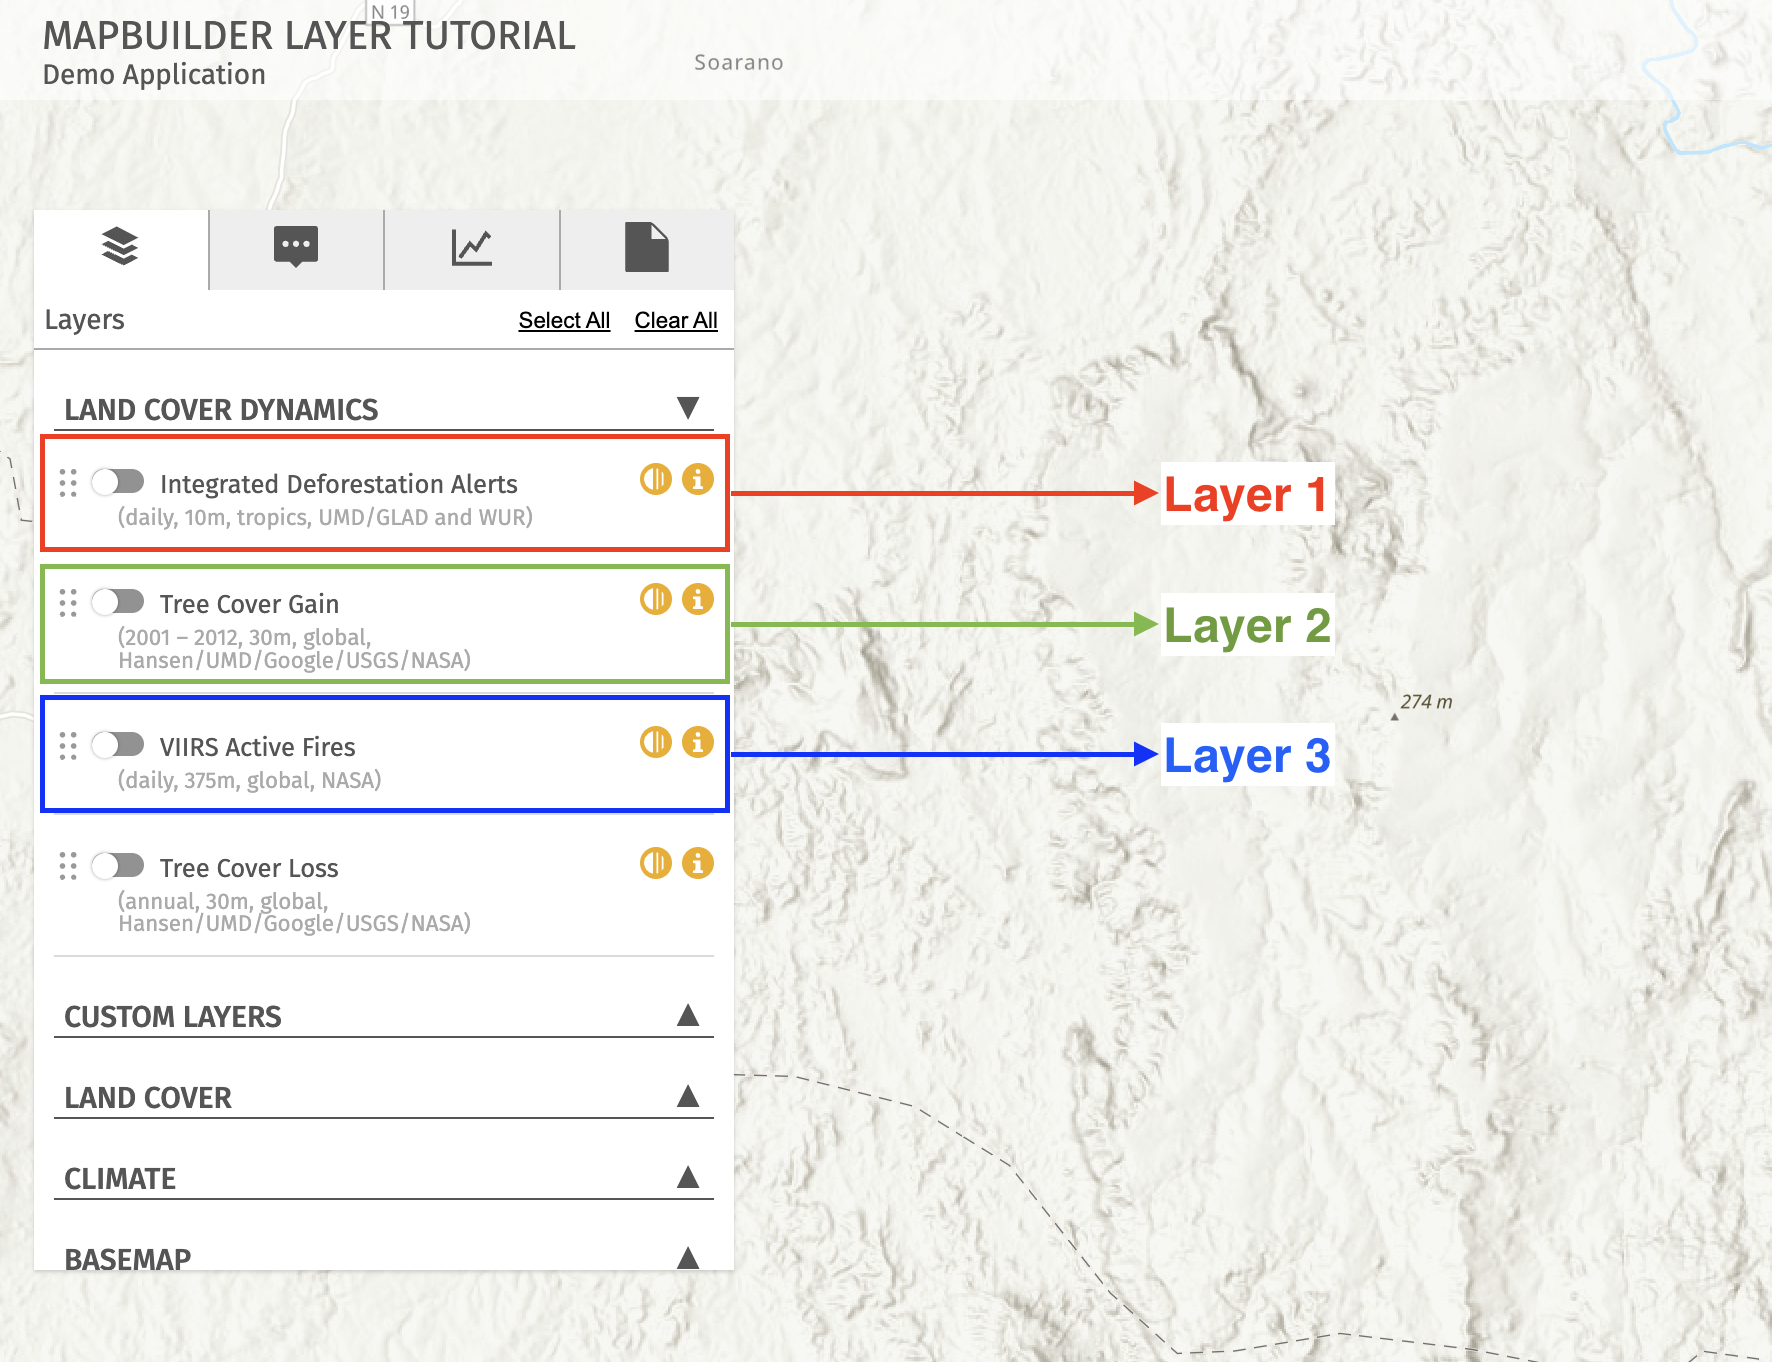
The screen shot below highlight three of the default layers in MapBuilder.
Layer organization in the configuration file
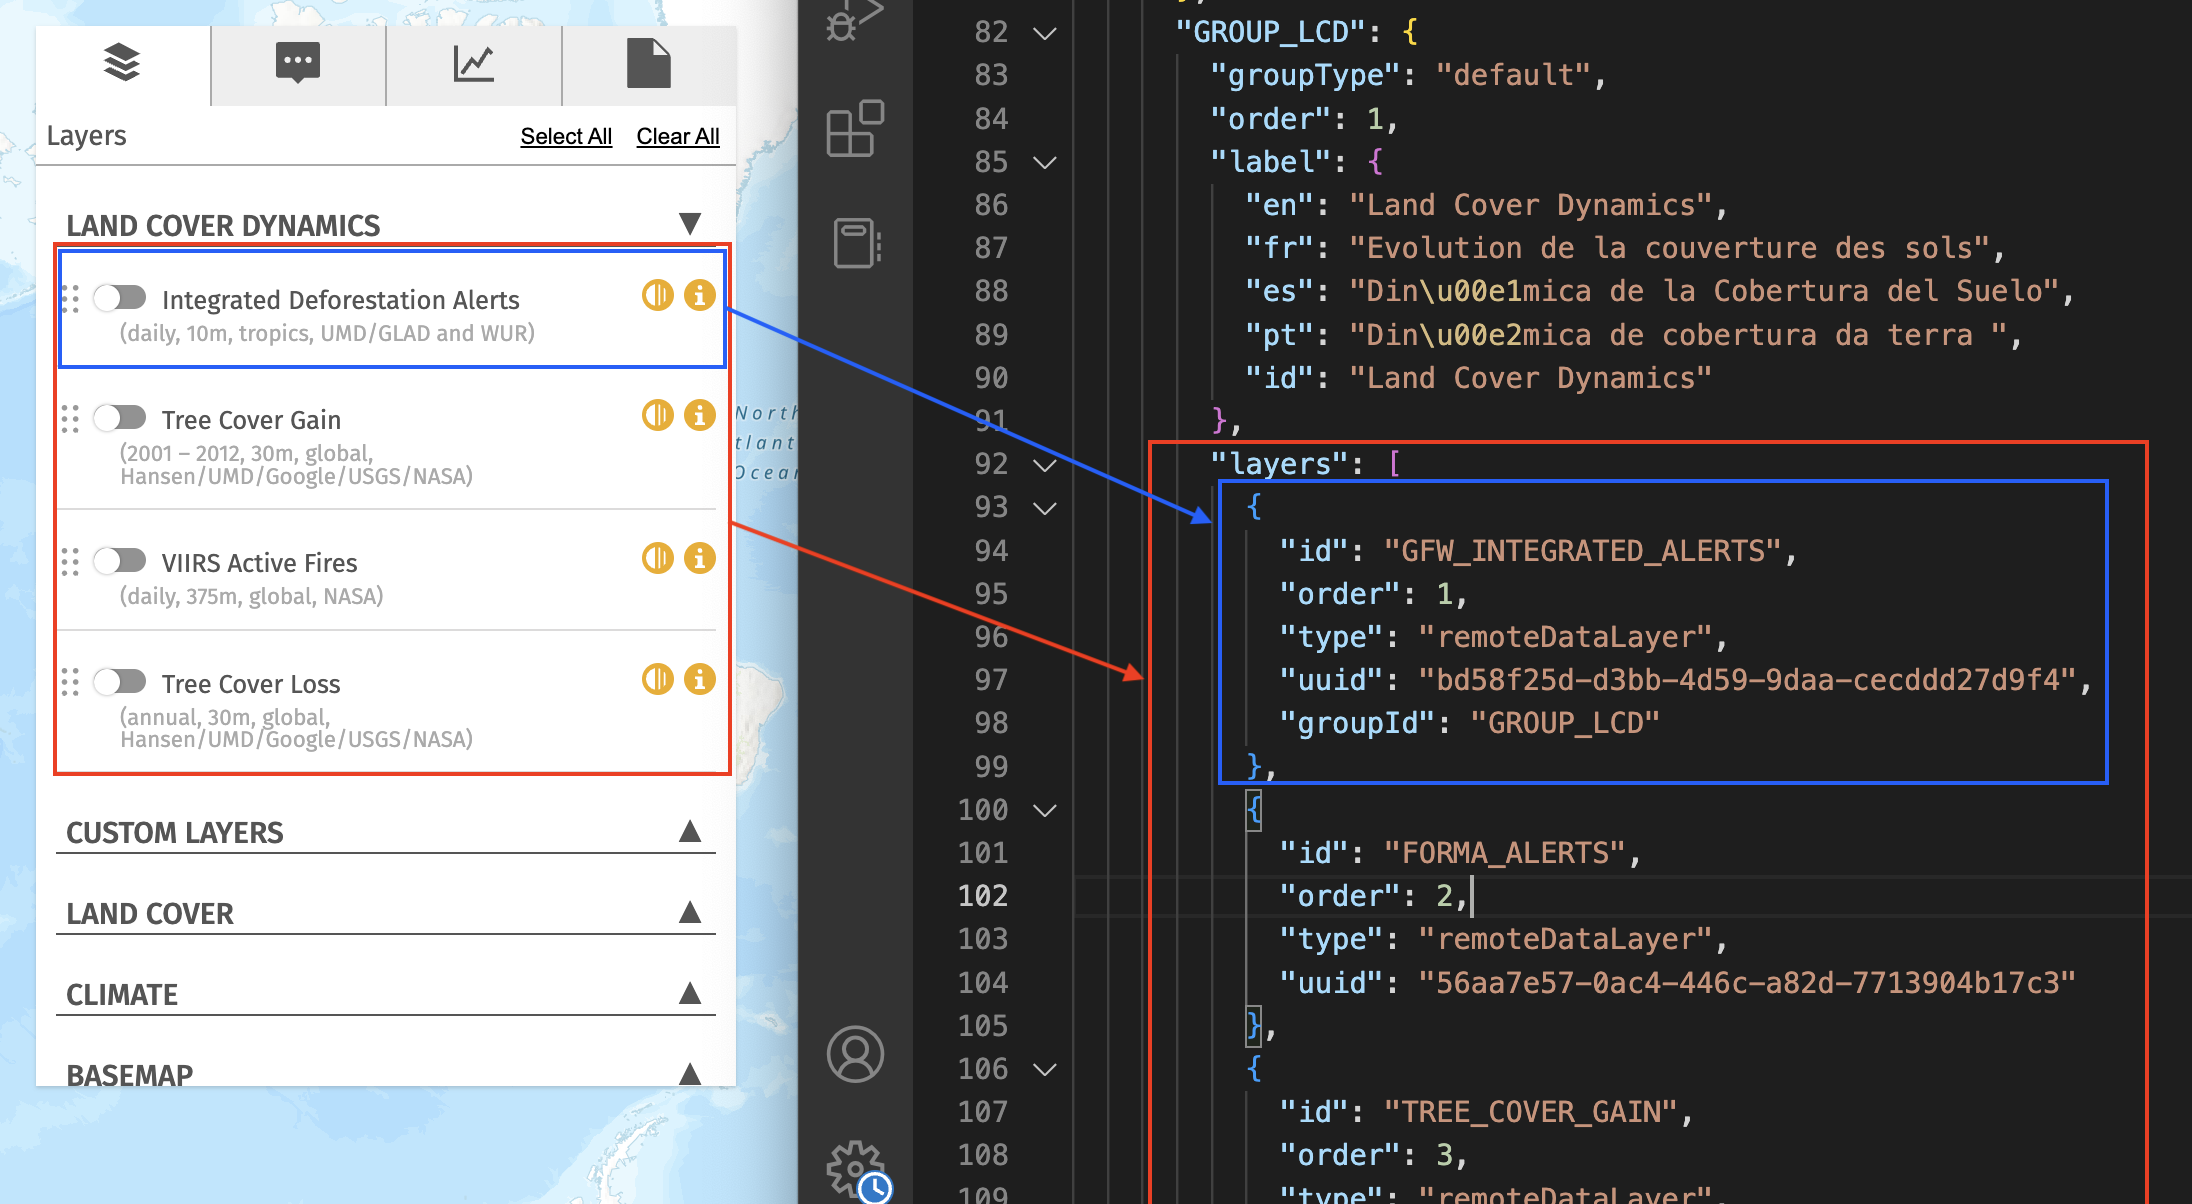
Layers must be defined inside of a layer group, which you can learn more about in this tutorial. All layers in MapBuilder are defined in the layers property within a layer group. The screenshot below shows a MapBuilder application on the left and the corresponding configuration file on the right.
The layers property is an array of layer objects and is highlighted in red above. Each layer object contains details about a layer and is highlighted in blue above.
How to add a new layer
1. Define a new layer object
To add a new layer, you need to define a new layer object to place in the layers array of layer group object. At a minimum, the layer object needs to contain the following properties:
- id: A unique identifier
- type: A text value that specifies the type of layer from the following options:
- tiled: Tile layer
- dynamic: Dynamic map service
- image: Image service
- webtiled: Web tiles
- wms: Web Map Service (WMS)
- feature: Web Feature Service (WFS)
- label: An object that contains translations for the title of your layer group. Each language is defined by a property key and value pair. The key is a two letter ISO code and the value is the corresponding text. Read the GitHub documentation for label objects to see the languages you can define.
- url: URL providing data for the layer
Some types of layers require additional properties. Learn more about specific layer types in our tutorials.
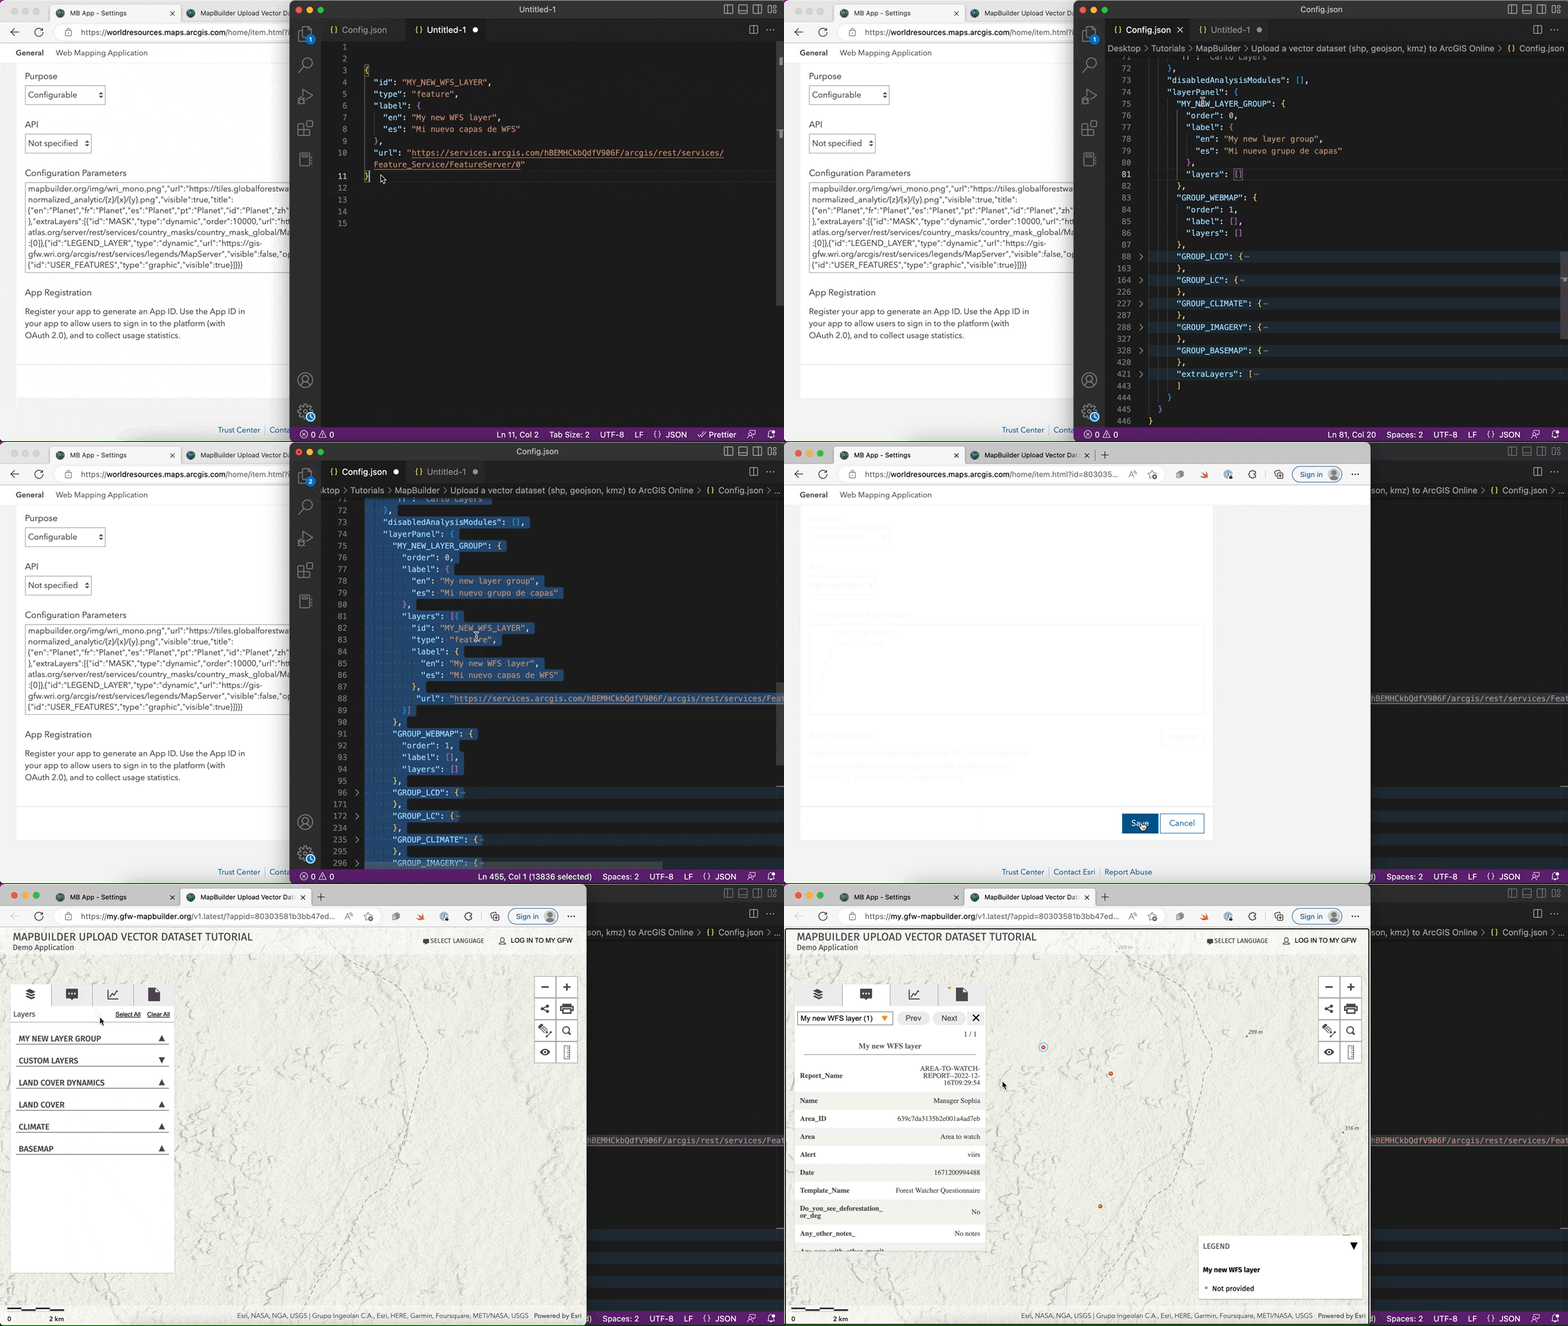
Here is an example of the most basic layer object for a Web Feature Service (WFS):
2. If necessary, add a new layer group to the configuration file
If you want to add a new layer to an existing layer group (for example, one of the default groups), then you can skip this step. However, if you want to add a layer to a new layer group, then you need to create a new one. For this tutorial, we will use a new layer group called “My New Layer Group”. Read how to create a new layer group here.
3. Add the new layer object to a layer array
Type or paste this new layer object into the layers property of a layer group in the configuration file. You can do this directly in ArcGIS Online, but it is usually easier to edit the configuration file in a text editor, then paste it back into ArcGIS Online. Read more about this process here.
Each layer object in the layers array is separated by a comma (,). If your configuration file is not saving properly in ArcGIS, make sure that you have a comma separating each layer.
4. Save your configuration file in ArcGIS Online
After you edit your configuration file to include the new layer group, be sure to save it in ArcGIS Online.
Additional properties for customizing a layer
There are other useful properties that you can define in your layer object to customize a layer:
- order: A numeric value that specifies where the layer is placed in its layer group. The first (top) position should have the value 0, the second position should have the value 1, and so on.
- opacity: A numeric value between 0 and 1 that specifies the percent transparency of the layer when the application first loads.
- visible: A boolean (true/false) value that indicates if the layer is visible when the application first loads.
Read about all of the options for customizing a layer on the MapBuilder GitHub wiki.
If you need additional assistance, please do not hesitate to contact us.


