In this tutorial you will learn:
- What metadata is and where you can find it for a data layer
- Which types of data layers allow you to edit their metadata
- How to edit metadata for data layers hosted on ArcGIS Online
To start this tutorial, you need:
- A MapBuilder web application. If you do have one, visit the tutorial Step 2: Create a MapBuilder application in ArcGIS Online
- An understanding of how to edit your configuration file in ArcGIS Online
What is a metadata and where can you find it?
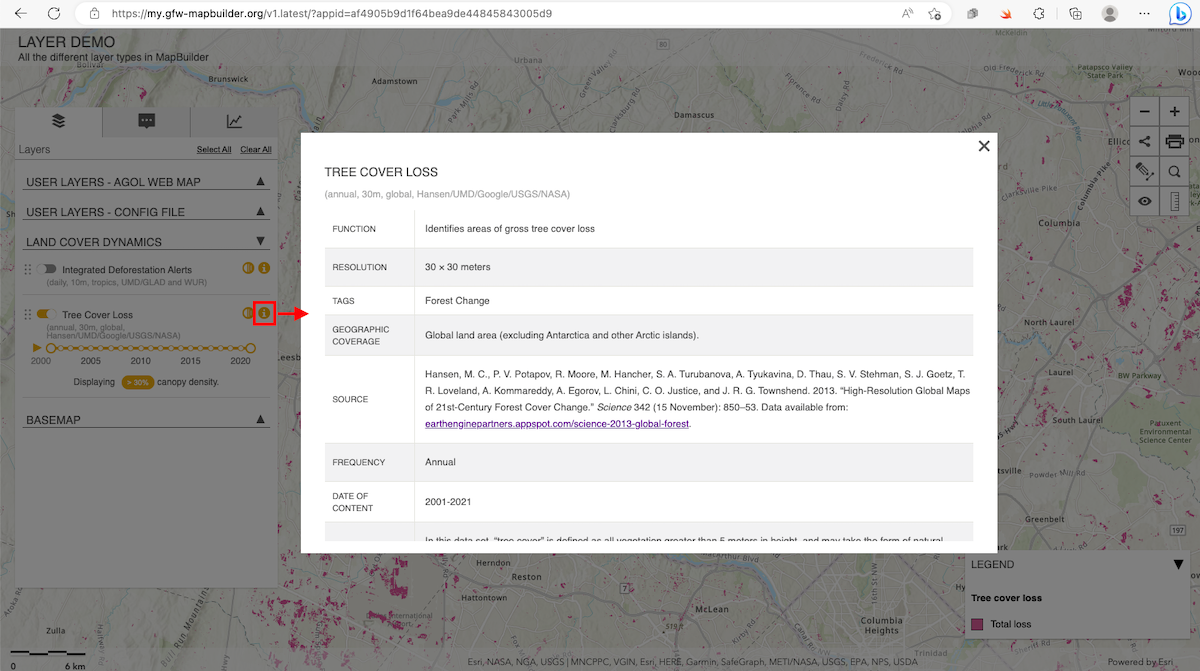
Metadata is descriptive informational about a data layer that provides important details about content, structure, and source. In MapBuilder, you can view the metadata for a data layer by clicking the “i" button next to its name in the layer panel.
Types of data layers that allow you to edit their metadata
MapBuilder supports several different types of data layers to their application. However, users can currently only edit metadata for tiled layers and web feature services hosted on ArcGIS Online. The MapBuilder team hopes to support editing metadata for more types of data in the future.
How to edit metadata for layers hosted on ArcGIS Online
1. Navigate to the Item Overview page of your ArcGIS Online data layer
This data layer should already be in a working MapBuilder application.
- Navigate to ArcGIS Online and log in.
- Click Content on the top menu.
- Locate your data layer in the Content page and click on its name to view the Item Overview page.
2. Edit the Summary
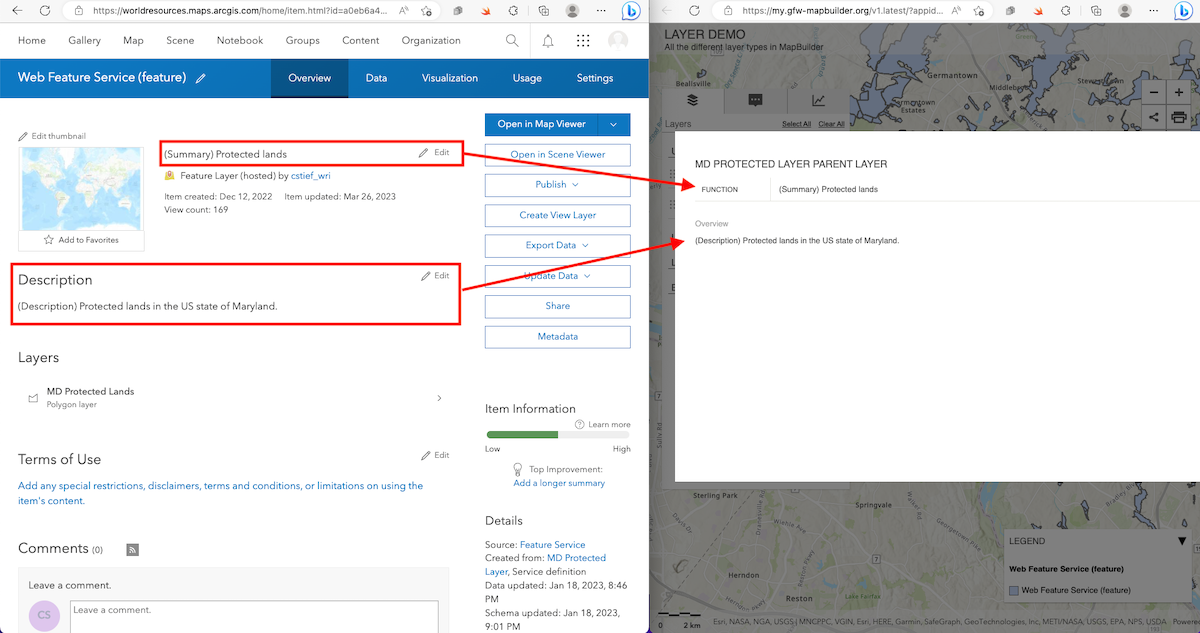
- Locate the Summary section at the top of the item Overview page. The summary should be to the right of the data layer thumbnail.
- If your data layer does not have a summary, you will see a label that says, “Add a brief summary about the item”.
- Click the Edit label.
- Type a summary for your data layer.
- Click the Save button.
3. Edit the Description
- Locate the Description section in the middle of the item Overview page. The description should be below the data layer thumbnail.
- If your data layer does not have a summary, you will see a label that says, “Add an in-depth description of the item”.
- Click the Edit label.
- Type a description for your data layer.
- Click the Save button.
If you added this data layer in the Web Map of your MapBuilder application, then you are finished. The summary and description will appear in the metadata popup for this data layer.
4. If necessary, add the item identifier to the layer object in your Configuration File
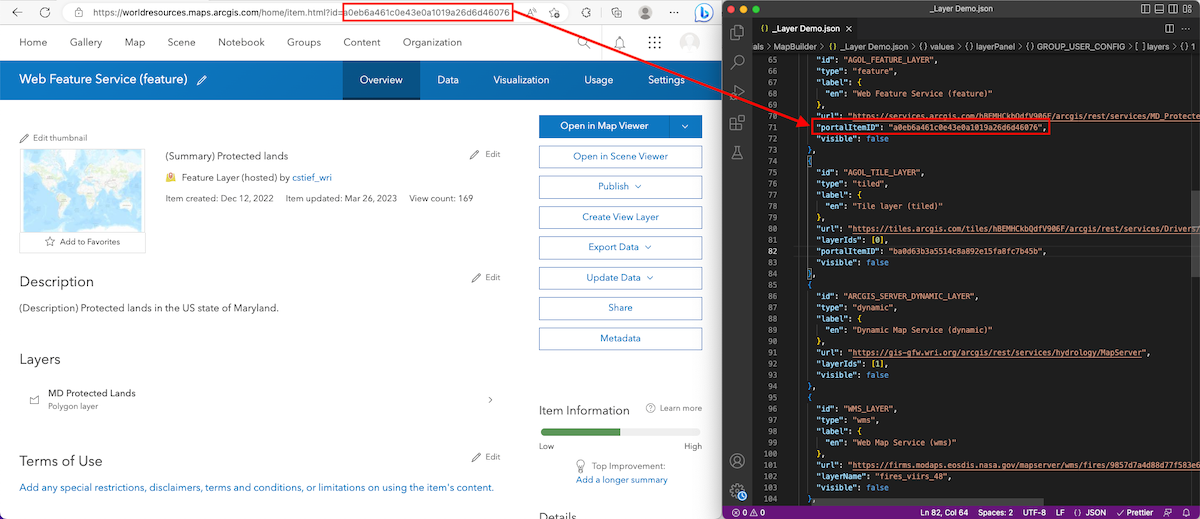
- Locate the item identifier in the URL when you are on the item Item Overview You can see the identifier after the “?id=” portion of the URL.
- Add a “portalID” property to your layer object in your Configuration File.
- Paste the item identifier as the value of the “portalID” property.
- After you edit your configuration file, be sure to save it in ArcGIS Online.
If you need additional assistance, please do not hesitate to contact us.


