In this tutorial you will learn:
- What the documents tab is and why you would use it
- How to associate documents with features in a vector dataset hosted in ArcGIS Online
- How to edit your configuration file to show the documents tab, which will let users access your associated documents
To start this tutorial, you need:
- A MapBuilder web application. If you do have one, visit the tutorial Step 2: Create a MapBuilder application in ArcGIS Online
- An understanding of how to edit your configuration file in ArcGIS Online
- An understanding of how to upload a vector dataset to ArcGIS Online
- An organizational ArcGIS Online account
What is the documents tab?
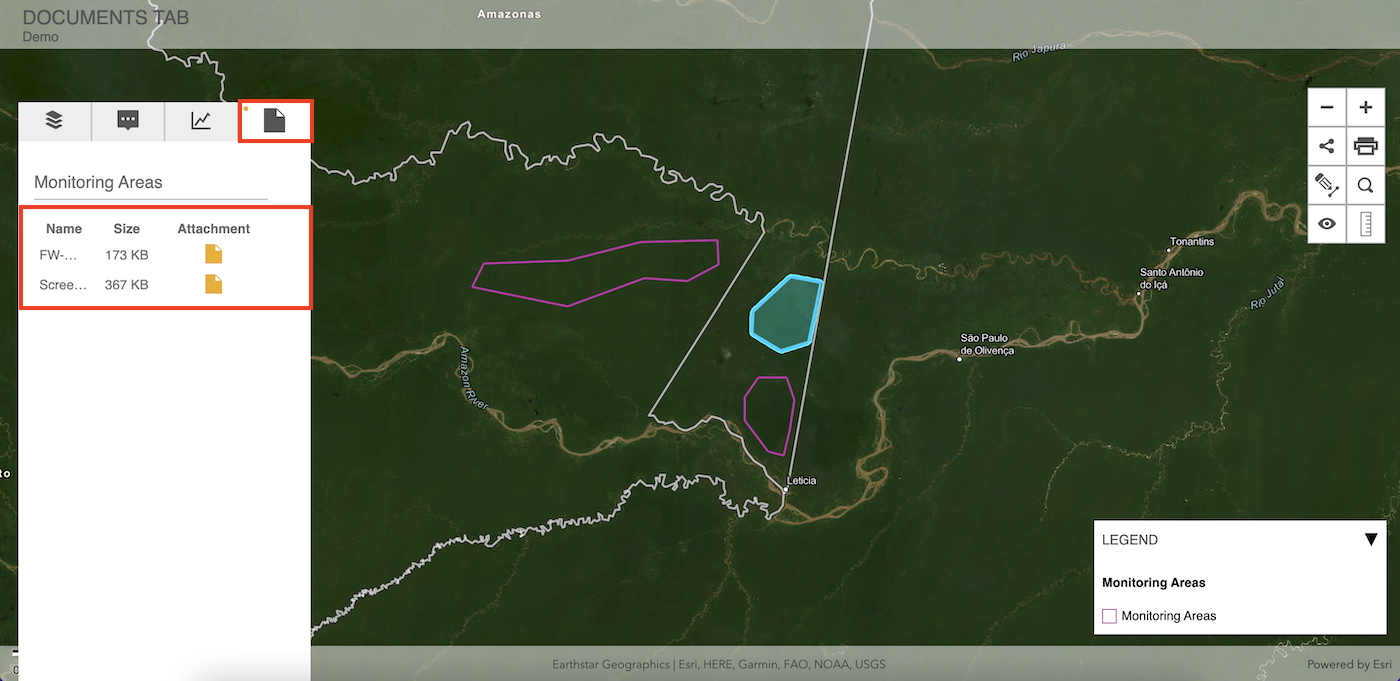
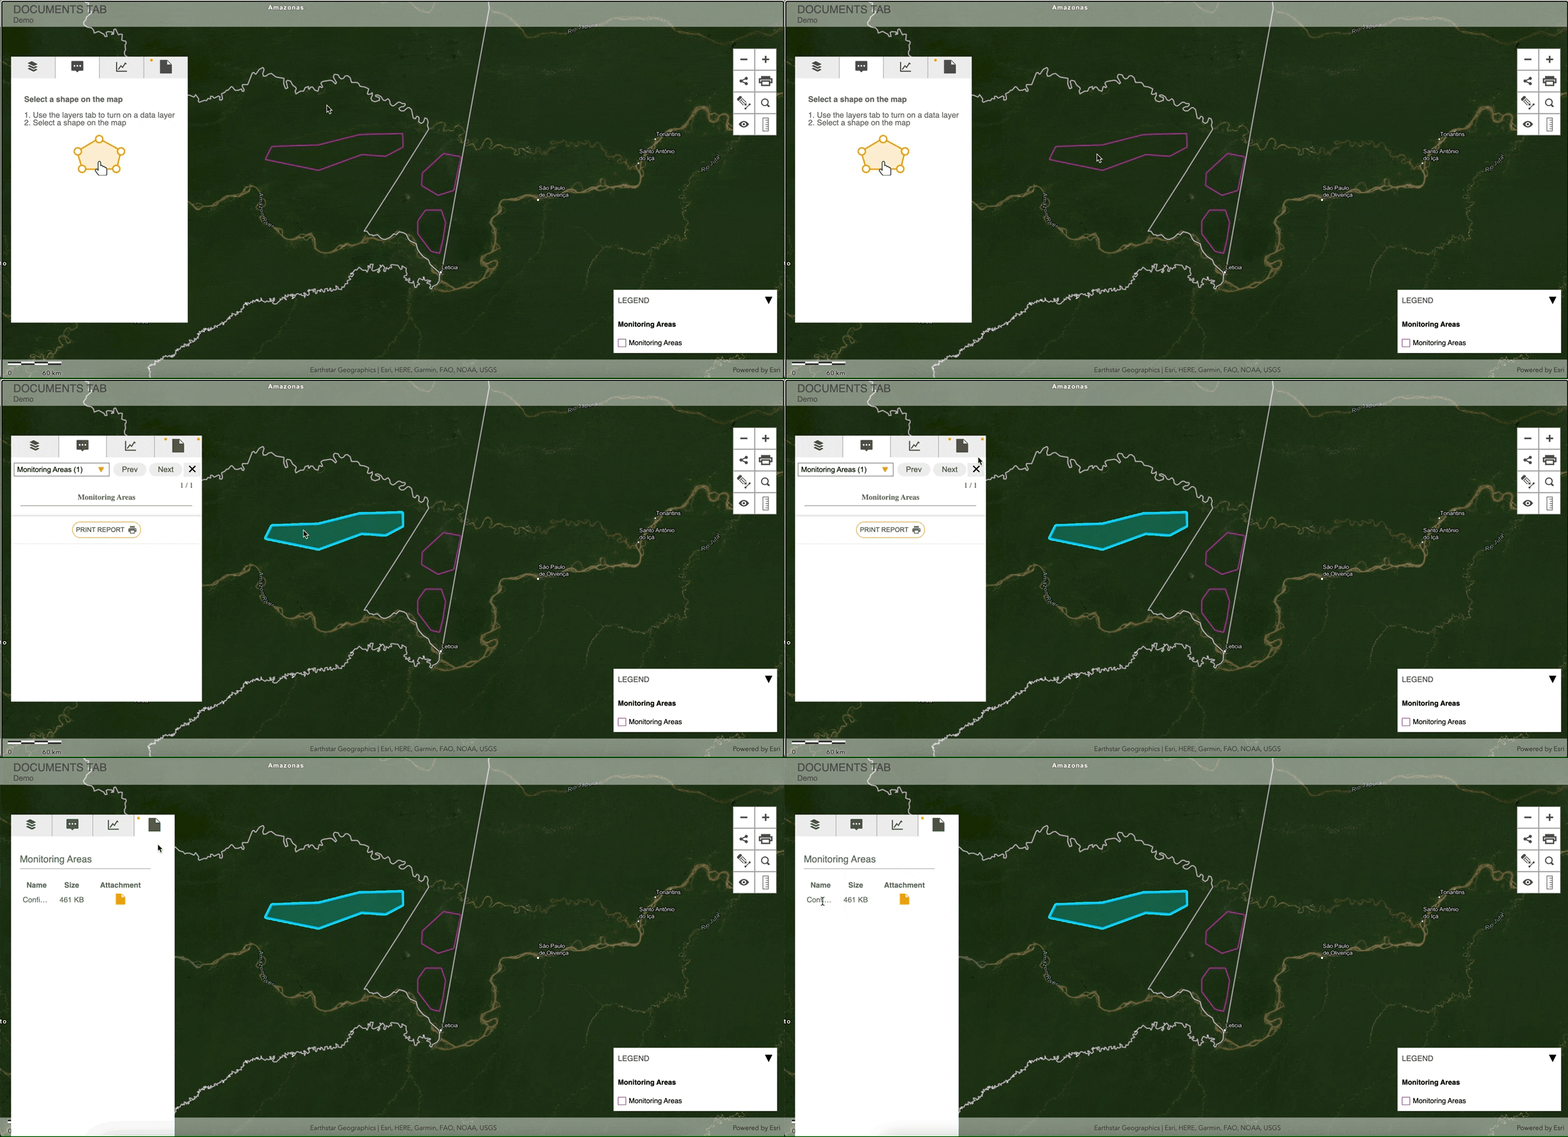
The documents tab is an optional section in the control panel that allows you to share documents with your users. When the user selects a feature from a visible vector dataset and if the documents tab is activated, then any documents associated with that feature will appear in a list in the control panel (see screenshot above).
You can associate documents with features in ArcGIS Online. These documents are called attachments on that platform. The list of accepted file types is described here. Note that you must have an organizational ArcGIS Online account to use the attachments feature.
Associate a document with a feature in ArcGIS Online
1. Upload a vector dataset to your organizational account
Follow the tutorial on how to upload a vector dataset to ArcGIS Online. Make sure to focus on the second section titled "How to upload a vector dataset to an organizational AGOL account".
2. Enable attachments for your vector layer in ArcGIS Online
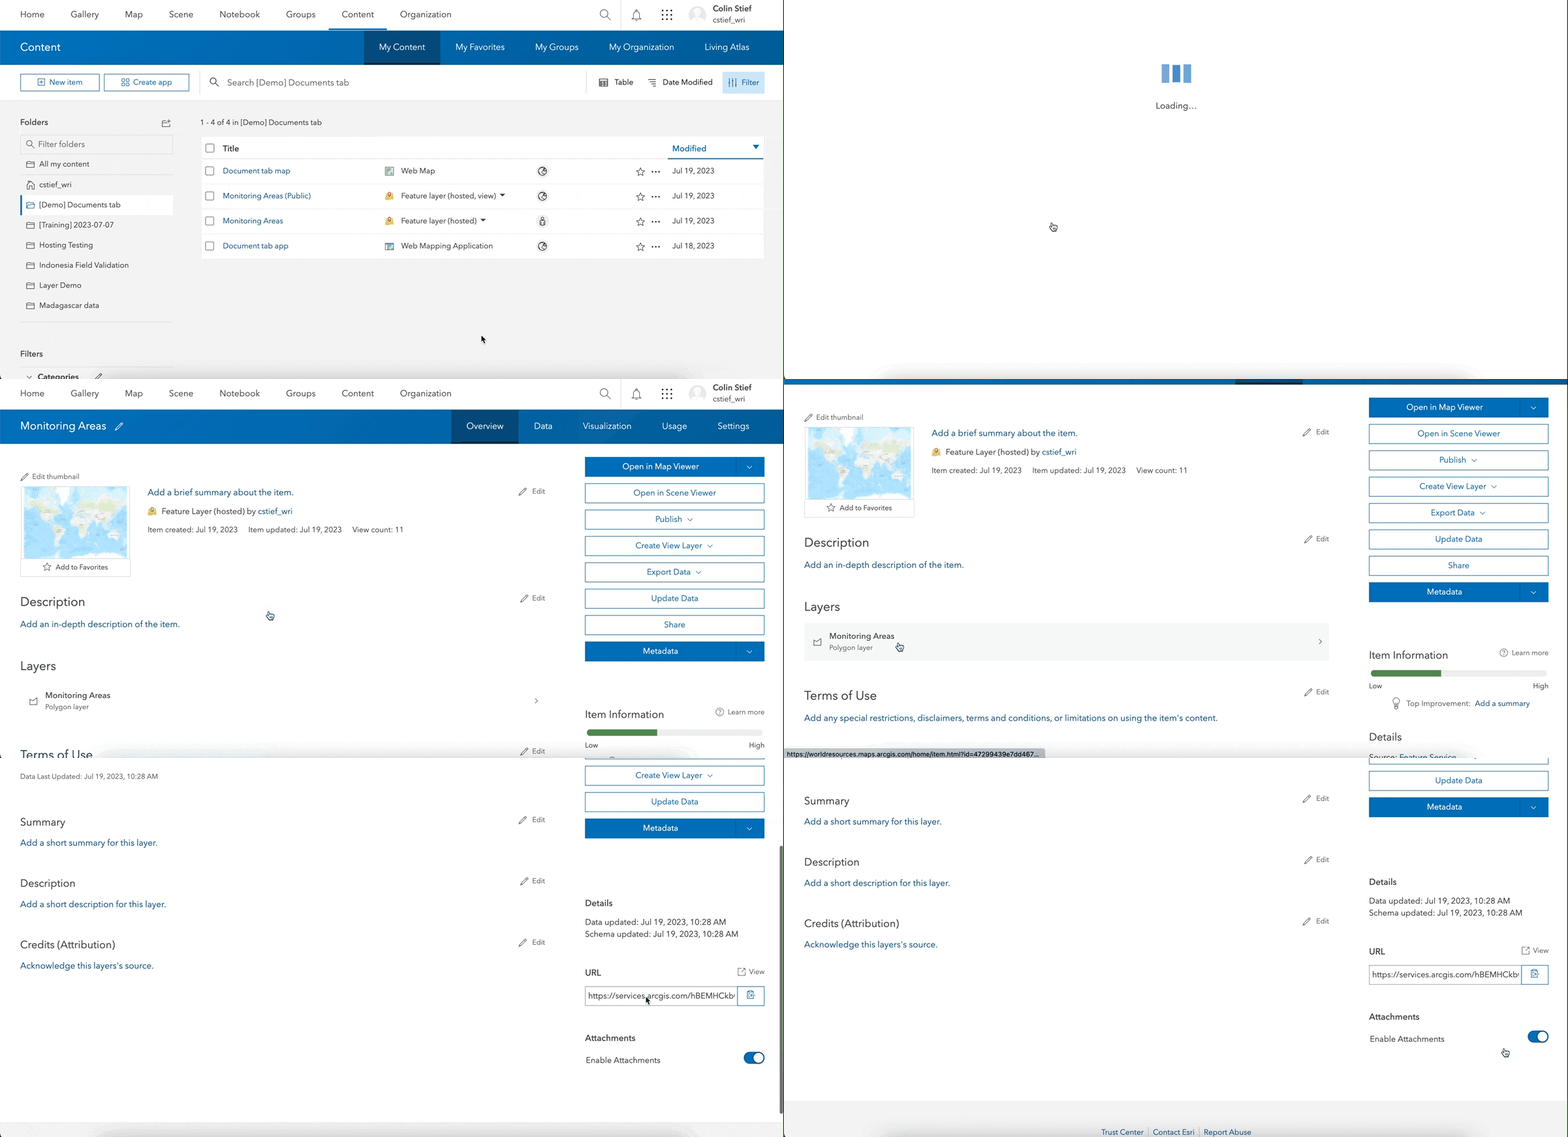
- Navigate to ArcGIS Online and log in.
- Click Content on the top menu
- Locate your vector data layer in the Content page and click on its name to view the Item Overview page.
- In the Layers section, click on the name of your data layer.
- On the right side of the screen, scroll down to the Attachments section. Verify that the Enable attachments option is toggled on. This will allow you to associate documents with individual features.
3. Associate a document with a specific feature
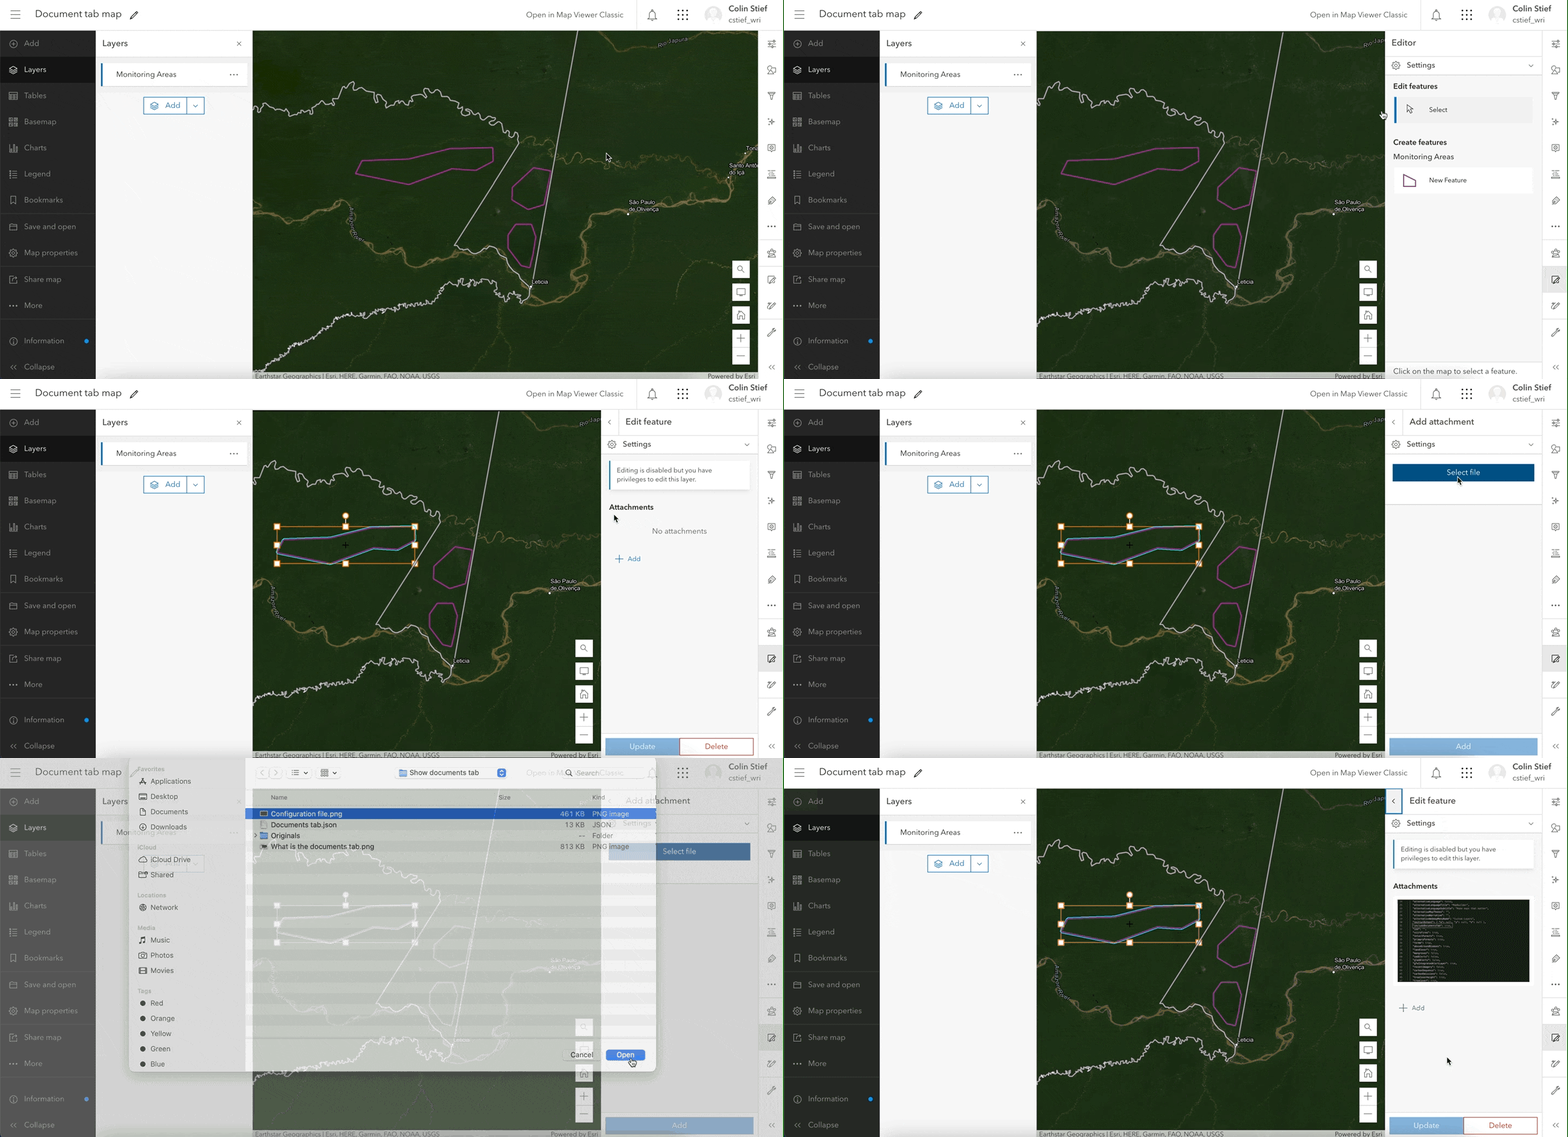
- Navigate to the Content page.
- Locate your vector data layer in the Content page and click on its name to view the Item Overview page.
- Click on the button labeled "Open in Map Viewer".
- On the right screen menu, click on the Edit button. This will be an icon that looks like a square and a pencil.
- In the Edit features section, click on the button labeled "select".
- On the map, click on the feature you want to associate a document with.
- In the Attachments section, click on the button labeled "+ Add".
- Click on the button labeled "Select file".
- Select the document you would like to associate with the selected feature.
Change the "includeDocumentsTab" property value to true in your configuration file
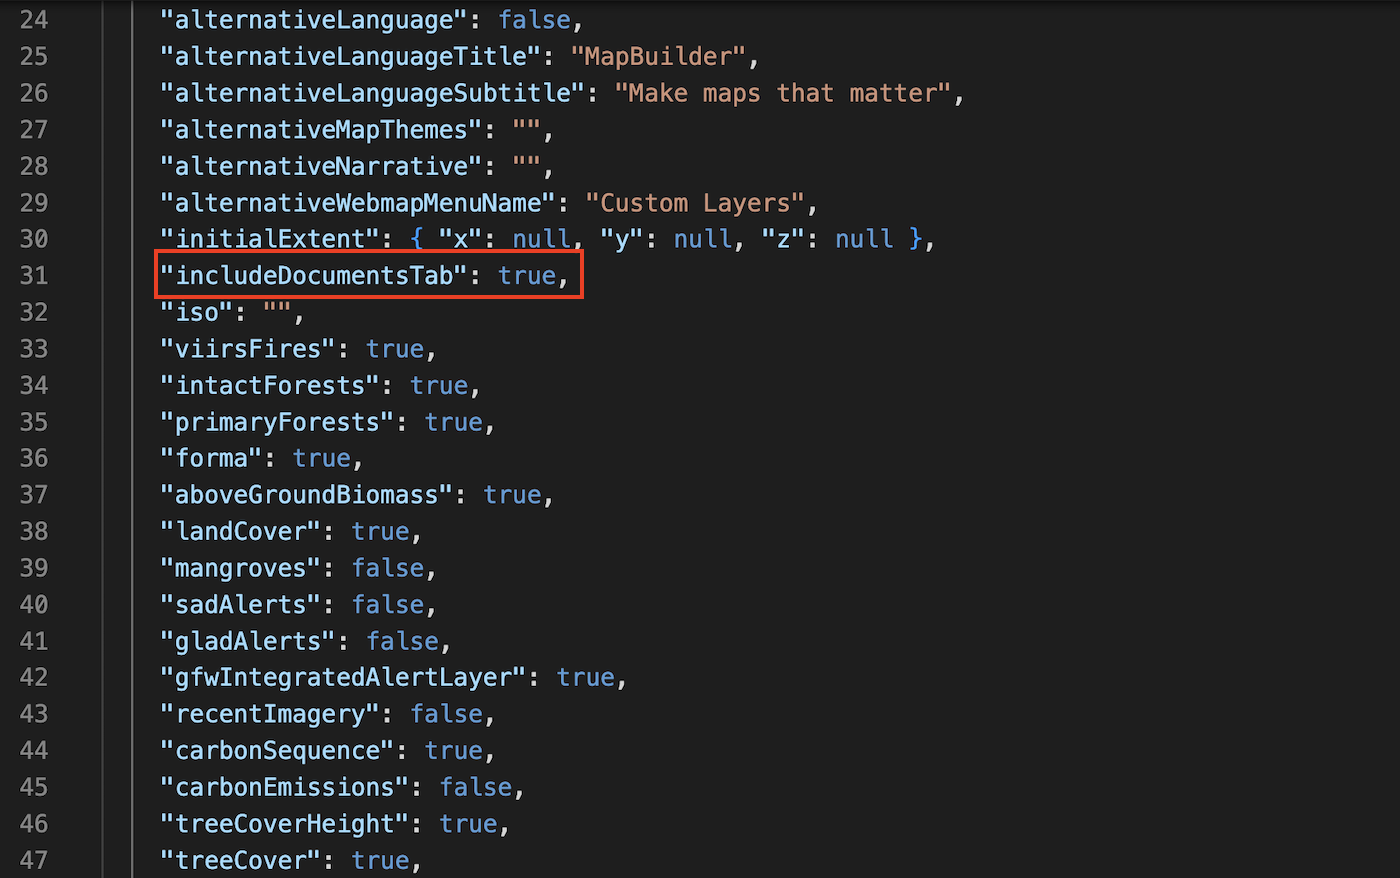
- Open your configuration file
- Change the includeDocumentsTab property to true.
Be sure to save the changes to your configuration file in your MapBuilder application. You can review this tutorial to learn about the proper way to edit your configuration file.
Click on a feature in your application to see its associated documents. Note that if a feature does not have any documents, the panel will appear empty.
Visit the MapBuilder GitHub Wiki to learn about all the available properties you can edit in the Configuration File.
If you need additional assistance, please do not hesitate to contact us.

